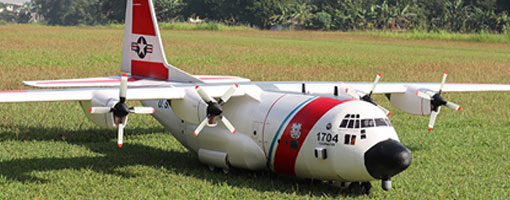
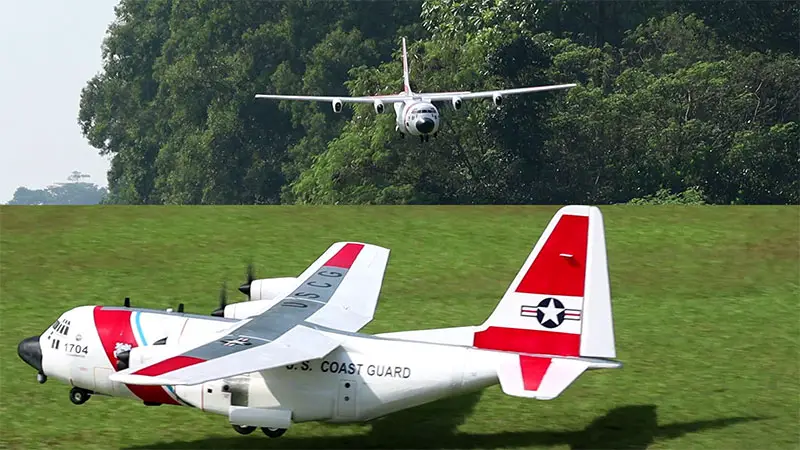
This is the biggest RC model plane that I ever build and fly. The wingspan is 3000mm or almost 10ft. Use almost entirely 5mm foam board as the build material. In this video also the first time I made propeller spinners with 3D printer, and make foam wheels and firewall with laser cutter. I use Creality Ender-3 V2 Neo for 3D printer and 10W CR-Laser Module to convert Ender Printer into laser engraver and cutter. Those tools help me alot and I got best results. I also 3D print some of detail parts.
Supported by PT Astragraphia Xprins Indonesia (AXI)
Creality Brand Exclusive Distributor
for more info, please visit
Website: https://bit.ly/3DPrintingSolution
Social Media
Instagram: https://www.instagram.com/3dprintingsolution.id
Facebook: https://www.facebook.com/3DPrintingSolution.id
Youtube: https://www.youtube.com/@3dprintingsolution
Buy 10W CR-Laser Falcon Engraver
in Creality Store:https://bit.ly/3JotDrc
MAZBRON RC for aeromodelling parts :
https://www.tokopedia.com/mazbron
https://shopee.co.id/mazbron
Specs :
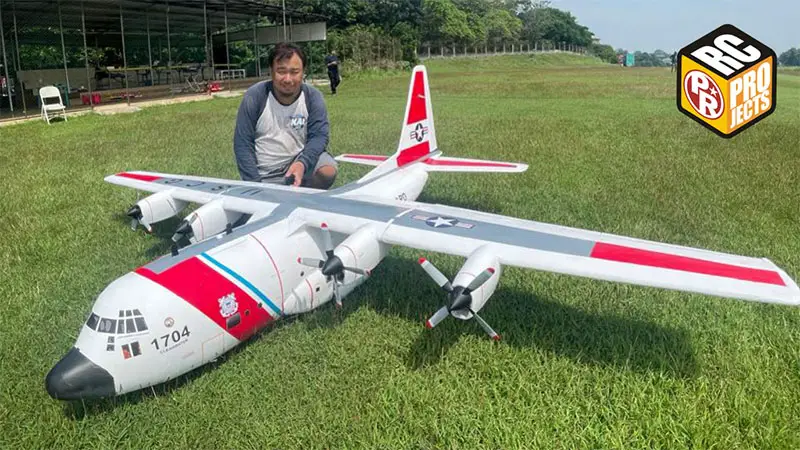
1. Wingspan 3000 mm / 118 inches
2. Flying weight : 4800 grams/ 169.3 oz
3. Wing loading : 47.8 gram/dm2 - 15.7 oz/sq.ft.
4. Wing cube loading : 4.8
5. Wing Area : 100.43 dm2 / 1557 sq.in.
6. CG : 11.5 cm / 4.5 inch from leading edge
Electronics
- 4x DXW 3536 1200kv
- 2x 80A ESC Hobbywing Skywalker
- 2x 50A ESC Aerostar
- 2x Battery Lipo 3S 2200mah
- 5 x 9 gram servos (metal micro servo)
- 1 x standard servo (steering)
Prop :
- 10x6x4 inch props
- 58mm 3D printed spinners
Materials :
1. 5mm Foamboard/ Depron/ Polyfoam
2. 2mm Plywood
3. hot glue, UHU glue, CA glue
4. wax paper
5. PLA Filament
BUILD INSTRUCTIONS :
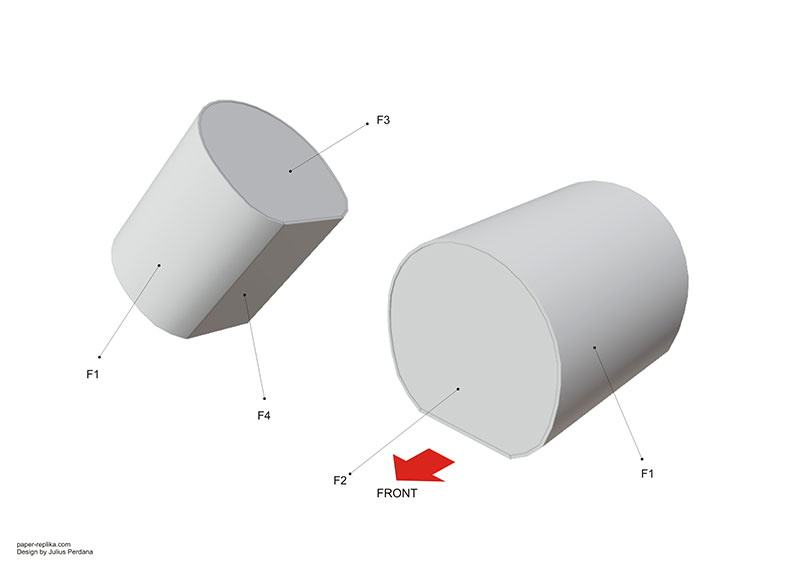
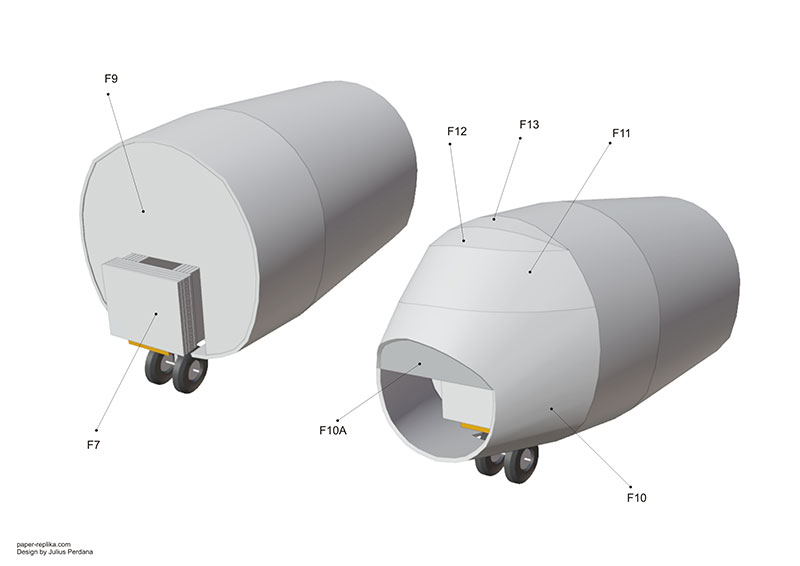
Please make sure your part orientation is correct, see the arrow facing front, Part F2 is on the front
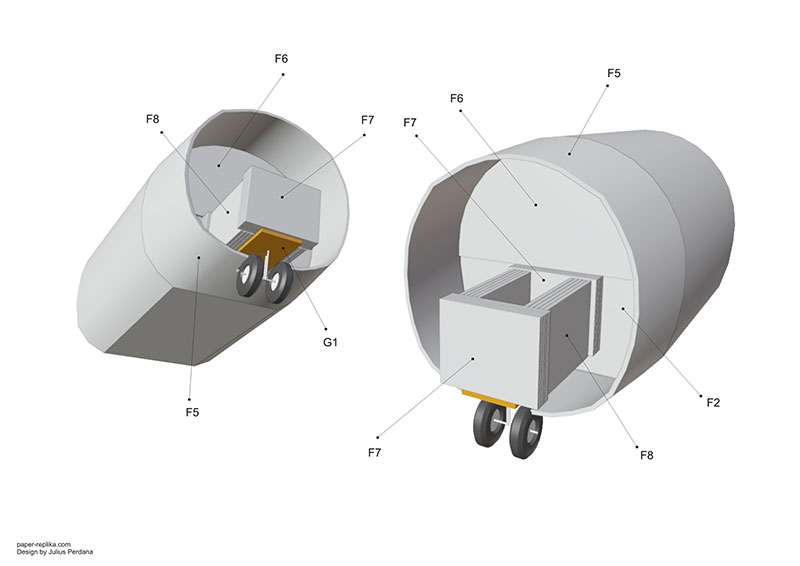
You can see more detail on how I build the front landing gear set on build video on youtube.
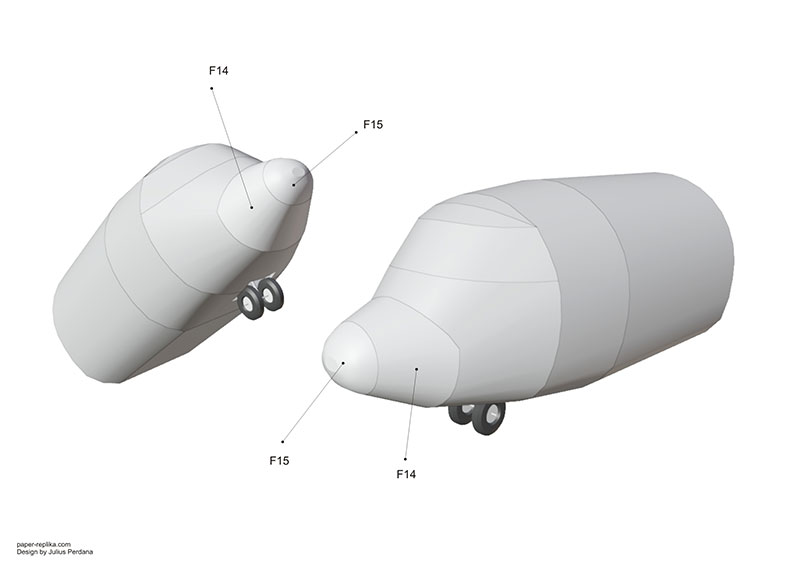
Stack foams on part F15 and carve it into a nose tip
Build Instructions continue to other pages
Download files :
- 3D Printed and laser cut files
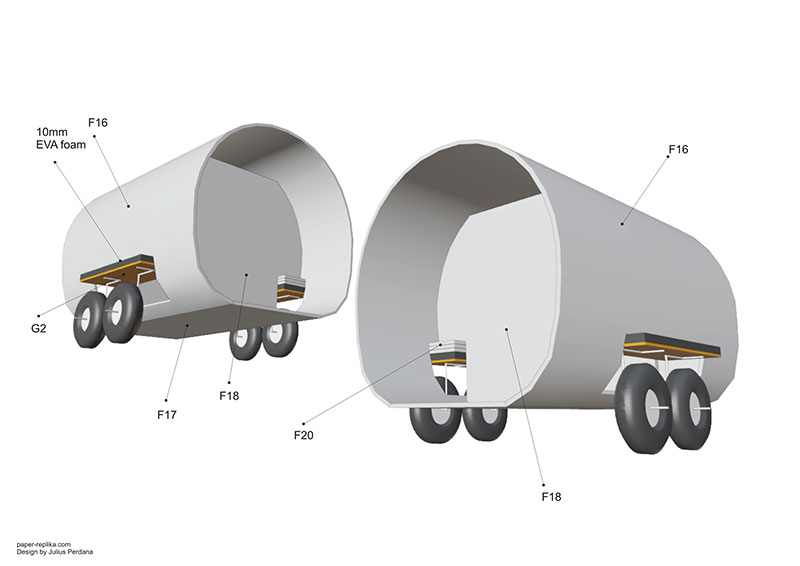
you can replace EVA foam with 2 stack of 5mm foam board
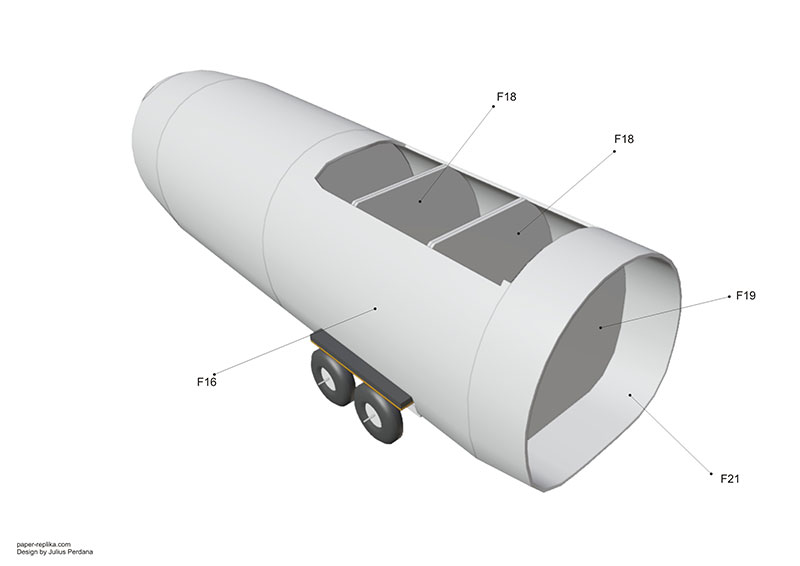
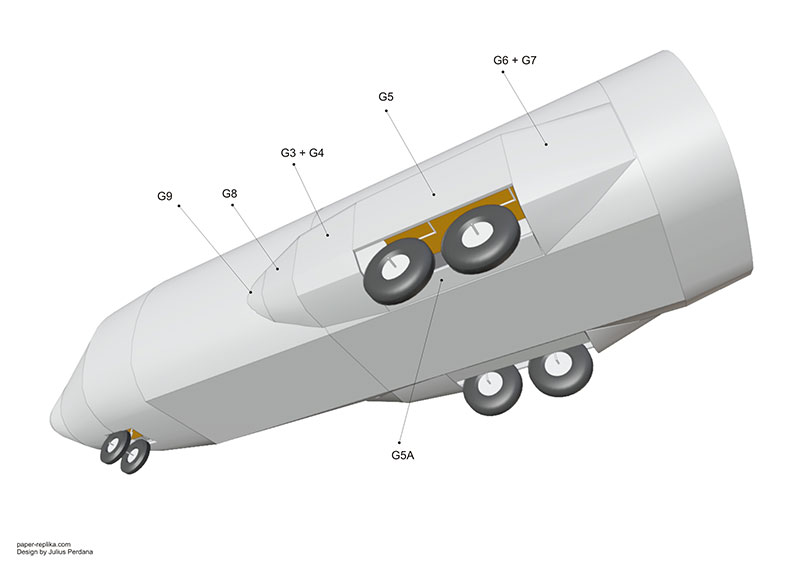
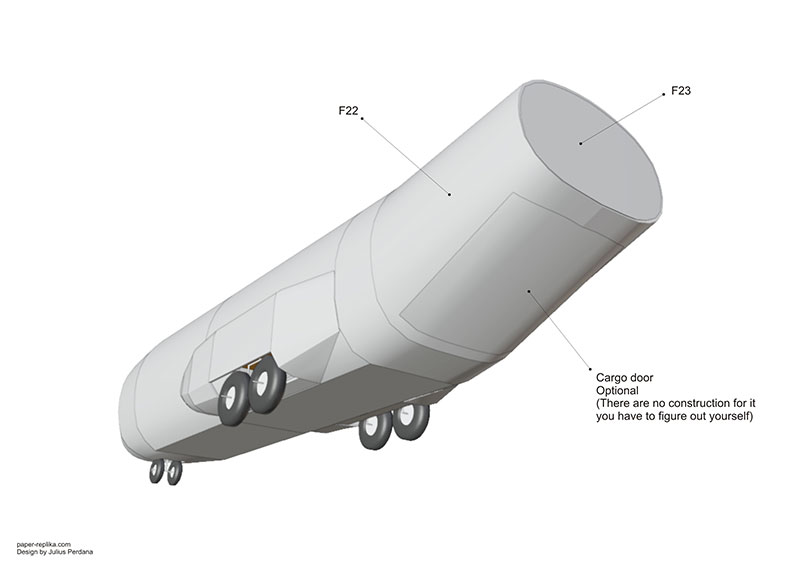
Cut cargo door after part F22 and F23 are already installed if you want to use the ramp door, however there is no further constructions for it and how to make it work, you have to figure out yourself, I just make the door available for cut if you want to.
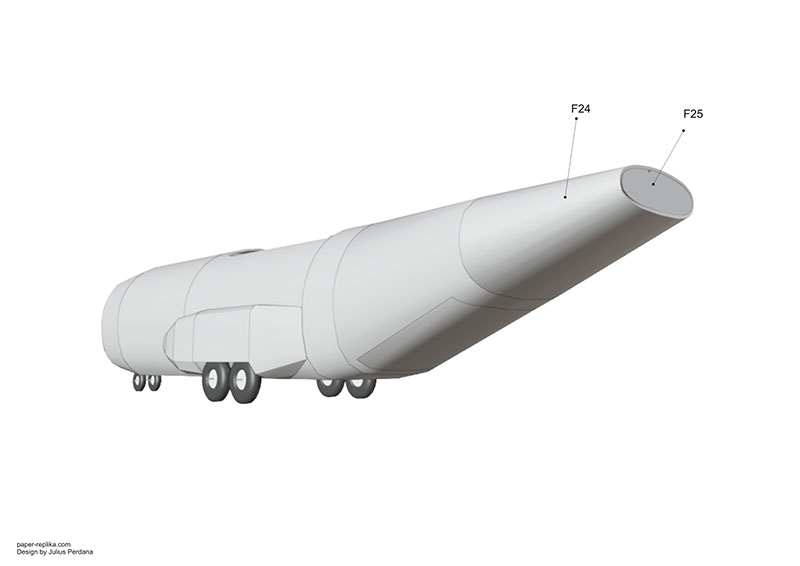
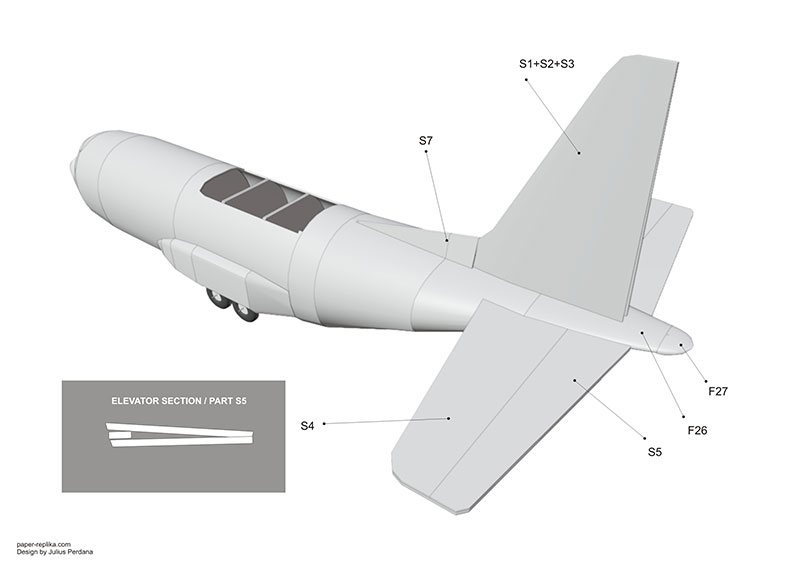
Part 24 and 26 are tricky, leave the packing tapes cover when you glue the parts, only peel it off after all parts are installed. On insert picture above is elevator section, how to assembly them because there is no scene about elevator on the build video.
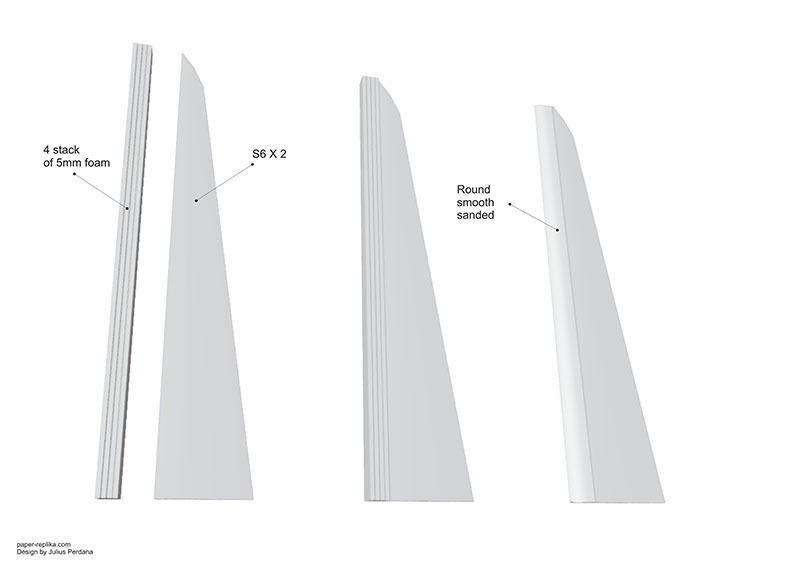
use the width of the vertical stab backend to measure the width of the stack of foam.
Build Instructions continue to other pages
Download files :
- 3D Printed and laser cut files
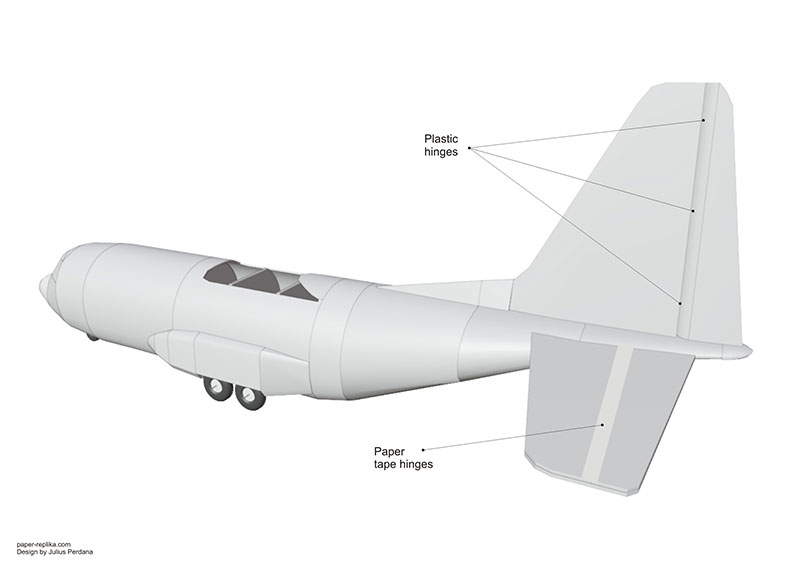
Use commercially plastic hinges for rudder, while for elevators and ailerons use paper masking tapes
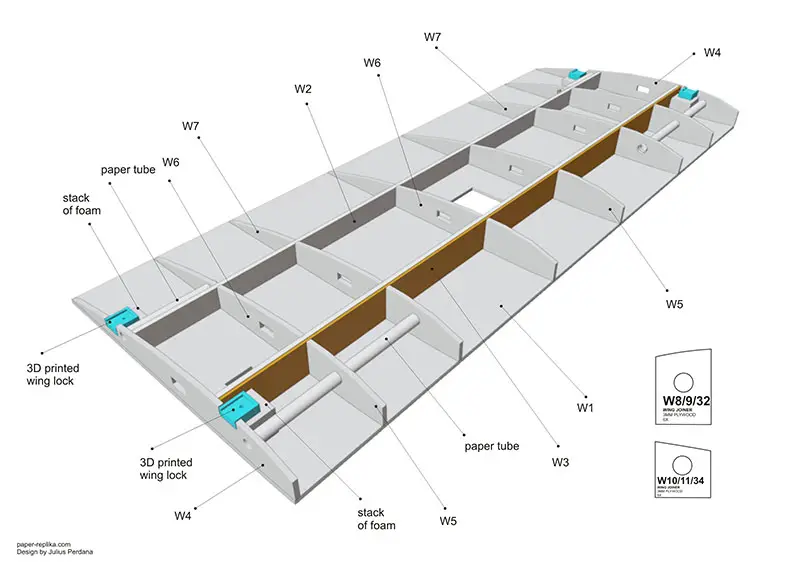
Use slots files in the 3D printed files or you can use 3mm plywood (see build video)
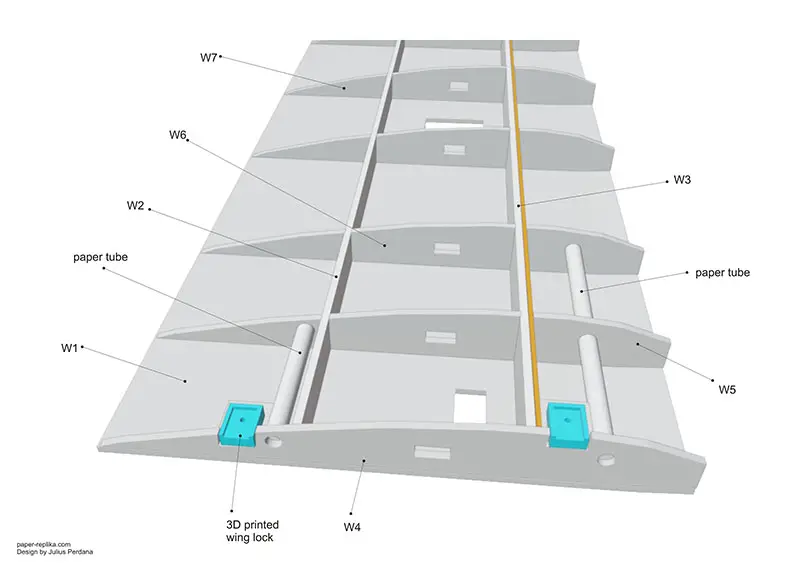
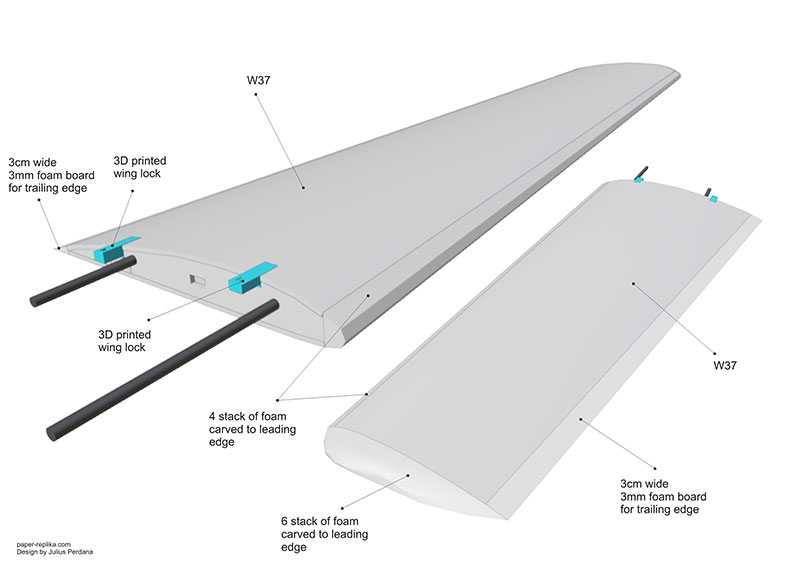
See how I installed the 3d printed wing lock on build video
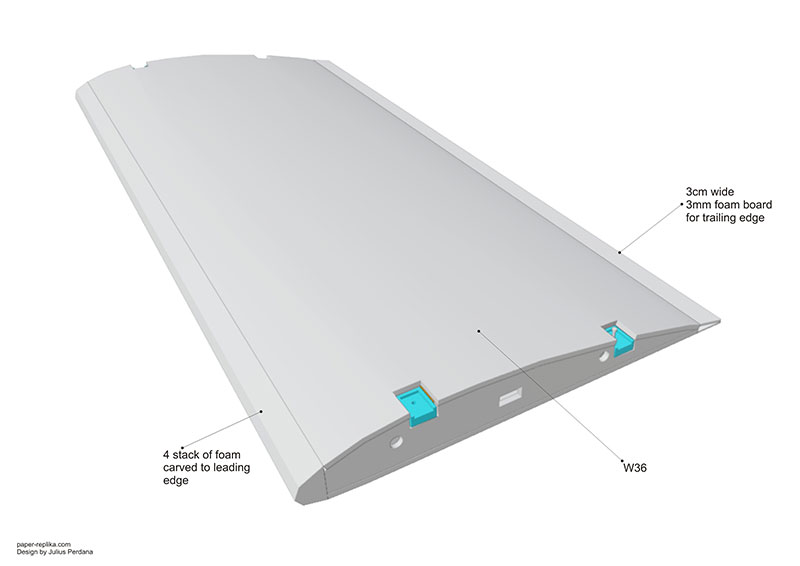
use 3mm foam board or 3mm plywood for the trailing edges, the width is 3 cm or 0.39 inch. Use stack of 5mm foam (4 stacks) for leading edges and carve and sand smooth it.
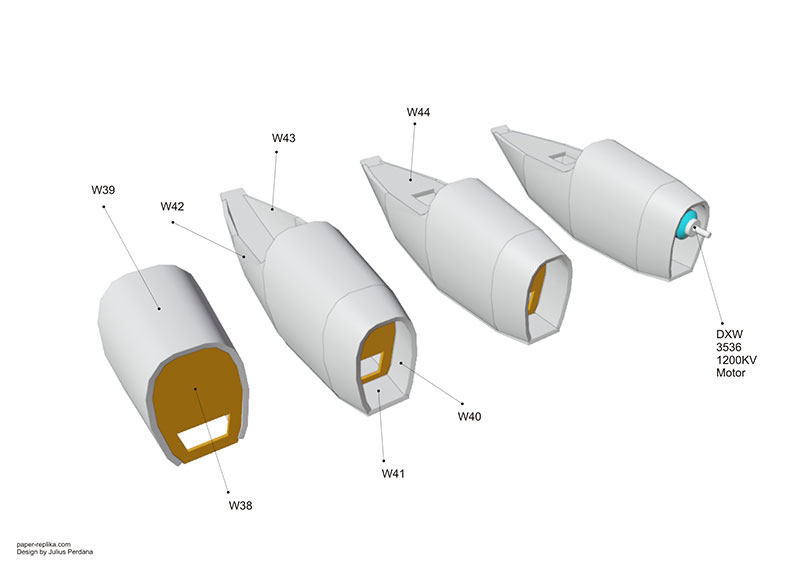
Use 2x of 3mm plywood for part W38 or firewall. Install the motor straight if you use contra-rotation props, but if you use regular CCW prop, angle each motors about 2 degree to the right.
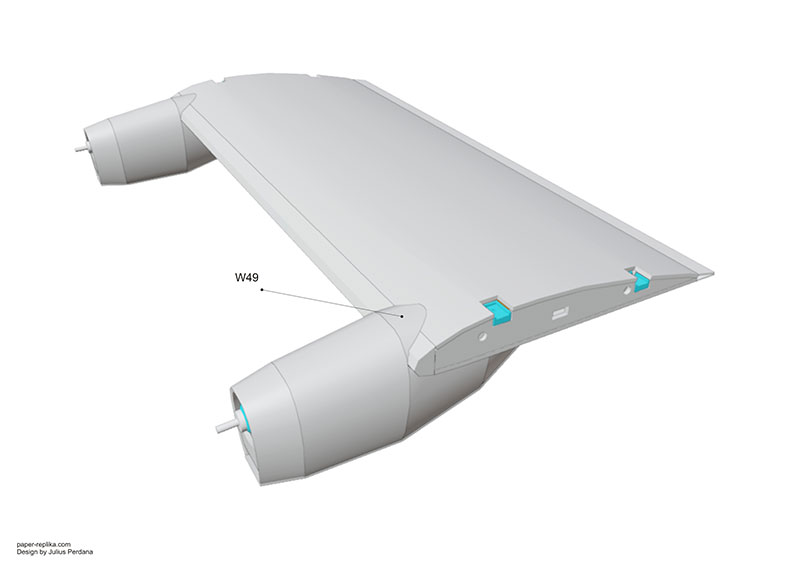
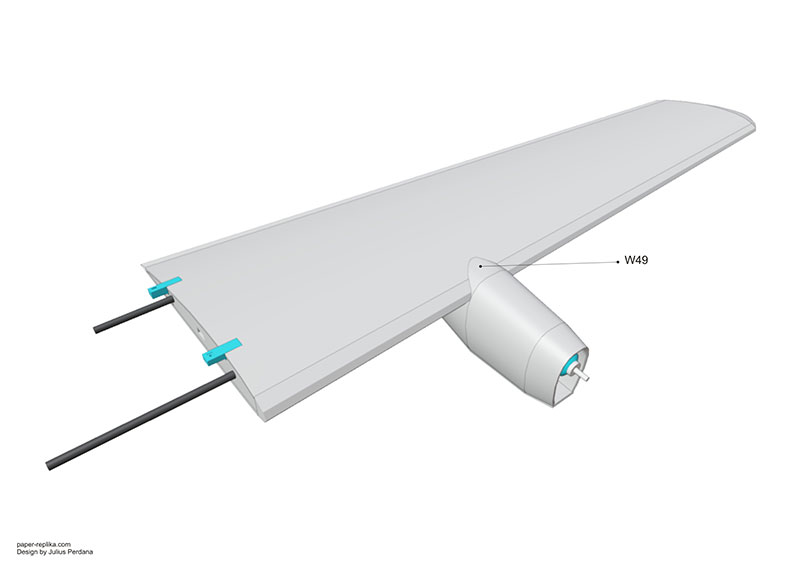
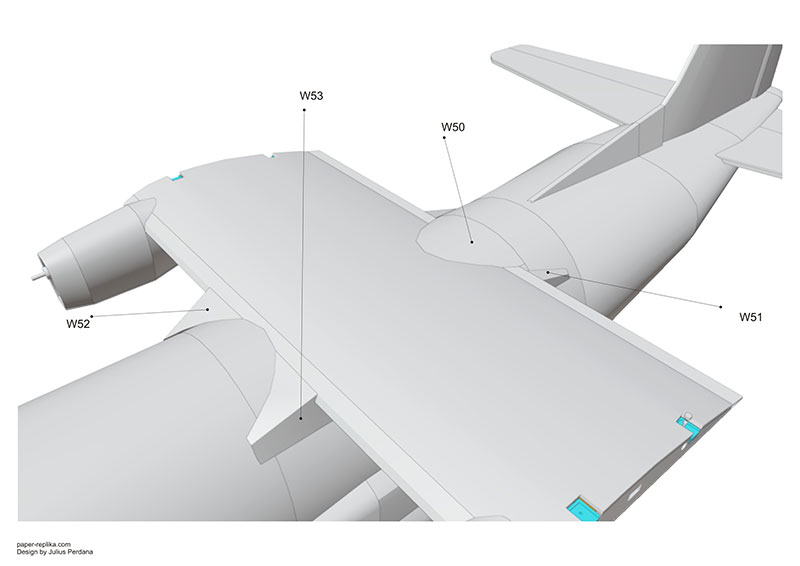
use 3mm foam board or paper card for part W49
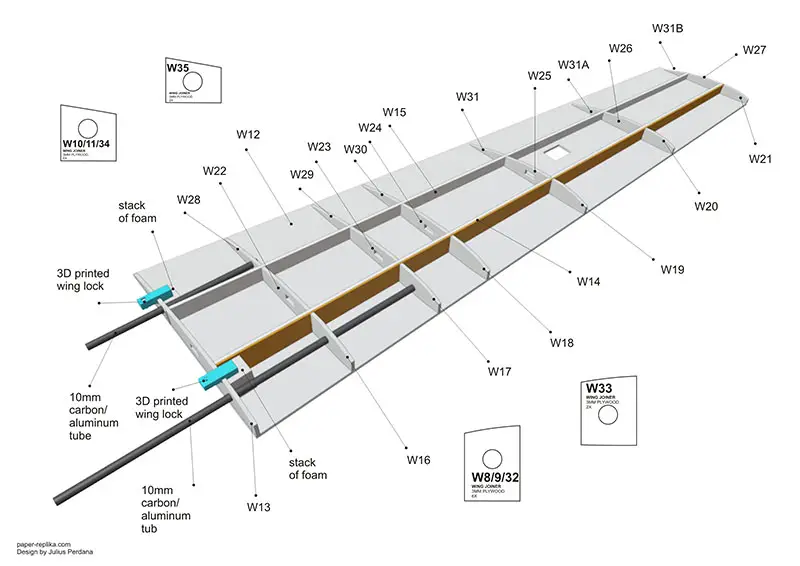
glue carbon/ aluminum tubes permanently to the wing ribs
Build Instructions continue to other page
Download files :
- 3D Printed and laser cut files
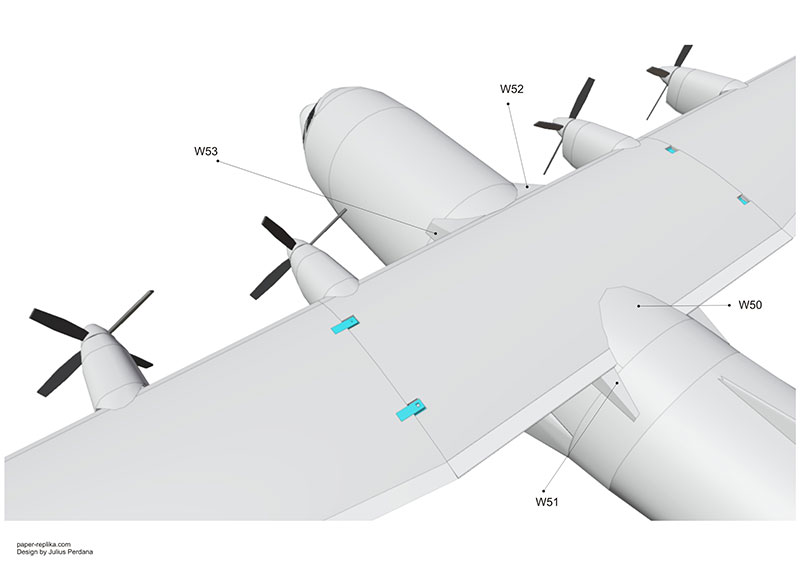
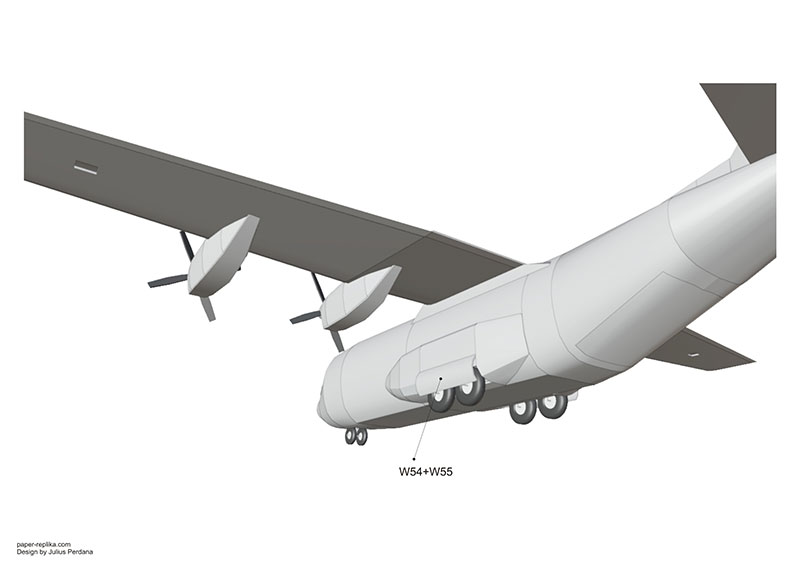
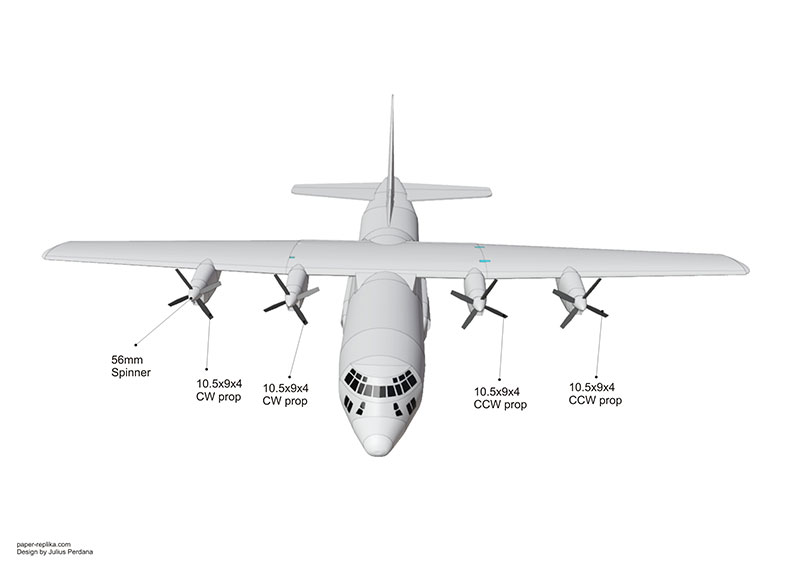
Alternatif props : 2 blades 12 inch props, 3 blades 11 inch props. This plane can still fly with only 2 motors.
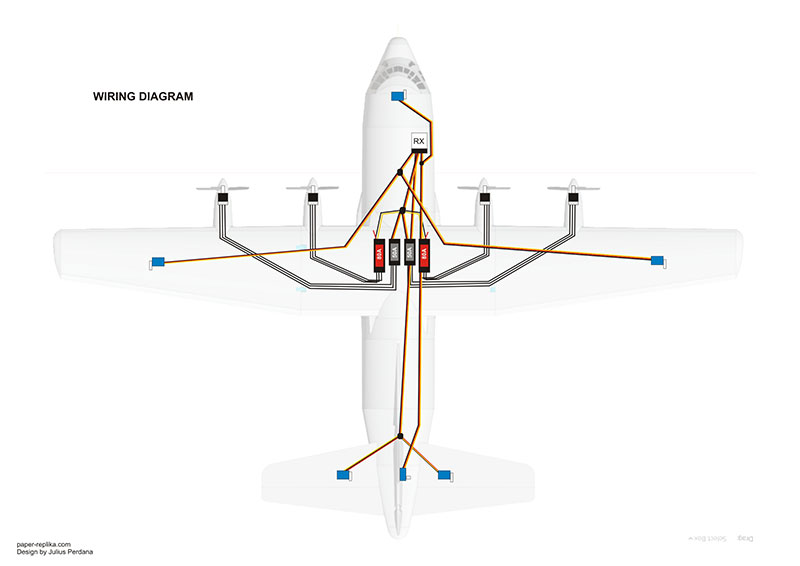
I use different pairs or ESCs, one pair with 50A and the other with 80A. 50A for outboard motors and 80A for inboard motors. I unplugged the red wire that connected 80A ESC to RX, because when I connect all cables, there was conflicted reaction, so to be safe I only use complete cables on 50A ESC.
Download files :
