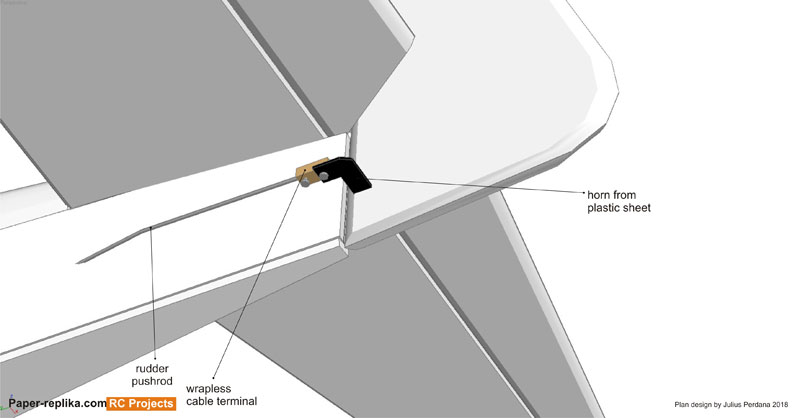
Cut a slit with cutting knife on the rudder and on that place as shown in the picture above. Add glue the bottom of the horn and insert it into the rudder slit that we made earlier. Install pushrod stopper or DIY with cable terminal.
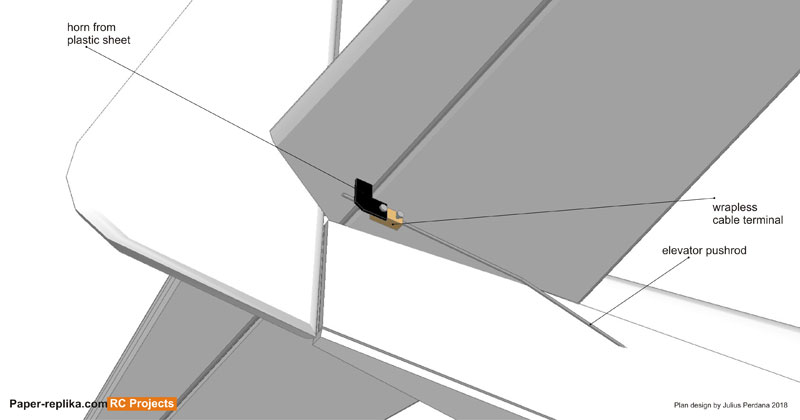
Similar way on the elevators. Cut a slit with cutting knife on the right elevators and on that place as shown in the picture above. Add glue the bottom of the horn and insert it into the elevator slit that we made earlier. Install pushrod stopper or DIY with cable terminal.
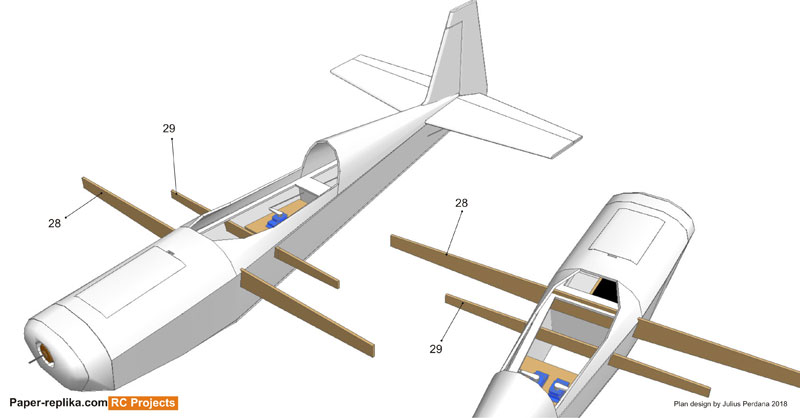
Insert 2 spars (28 & 29) through the fuselage. Also cut some part of part 15 (middle deck) to make way for front spar. Make sure all are centered before lock them with glue from outside.
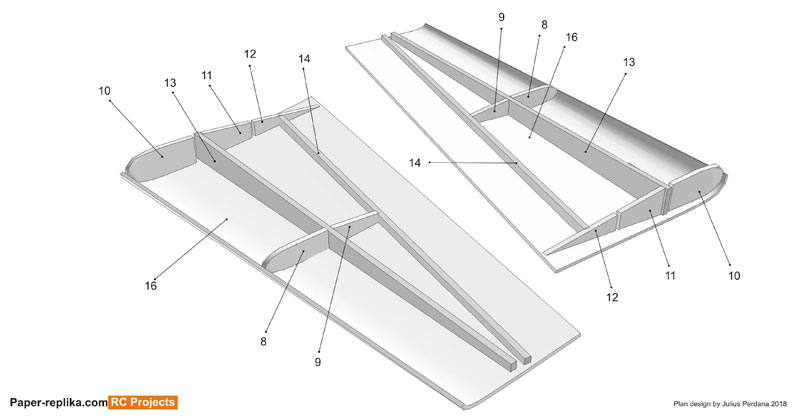
Bend and shape all 4 wing parts (16 & 17 and each mirrored copies). See how to shape the wing part on the tutorial video. Place and glue 2 spars (13 & 14) in their places. Put wing root rib parts (10,11 and 12). Watch the gap between ribs to make way for 2 plywood spars that we made earlier. Lastly put ribs 8 & 9 in the middle of wing.
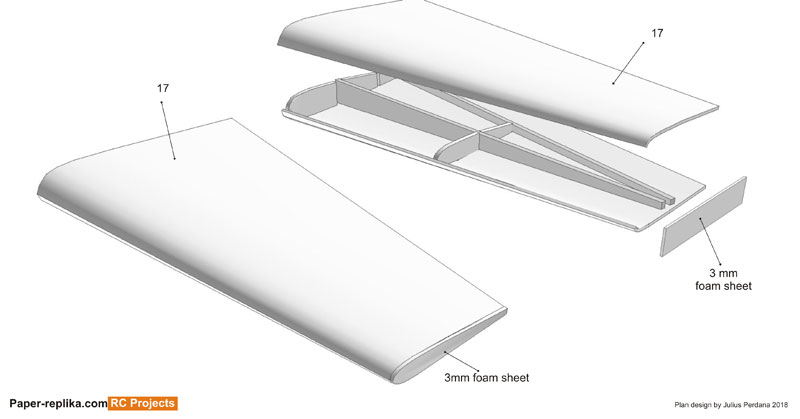
Close the wing with top part (17) by glueing the leading edge first. Also close the wing tip with 3 mm foam sheet. See tutorial video. Repeat the process on the other wing.
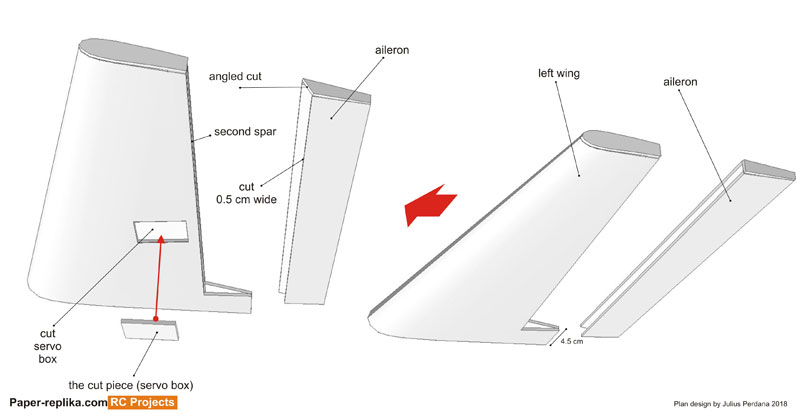
Cut the aileron (see tutorial video). Aileron starts right on the back of the second spar. I ends 4.5 cm from the wing root. Cut the servo box on the bottom side of the wing, glue the cut piece from the servo box, inside the servo box, on its ceiling. Cut bottom side of the aileron 0.5 cm wide. Angled cut the wing tip too.
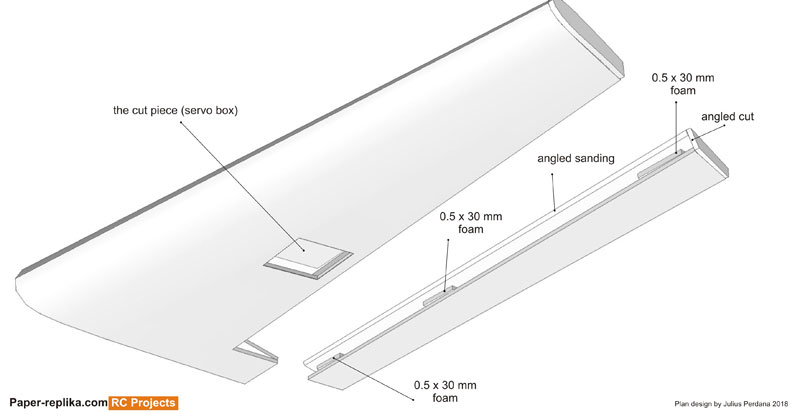
make 3 foam strips, 0.5 x 3 cm. And insert them in between the two aileron sides. One right in front of the servo box and two in each ends. Finally angled sand the upper edges.
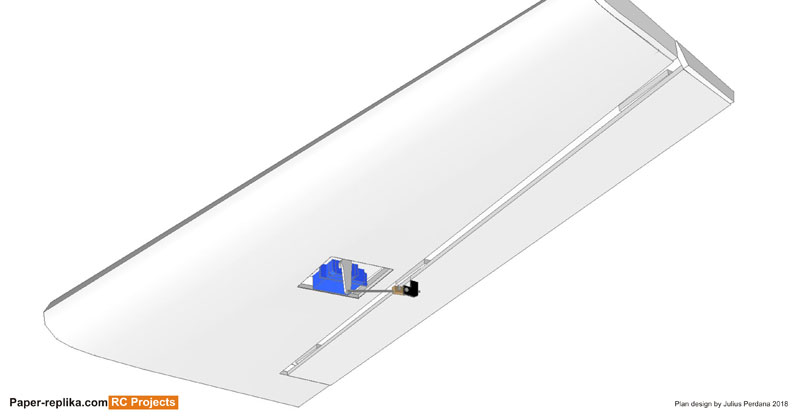
Cover both wings with packing tape of vinyl sticker, add hinges for ailerons. Install a 9 gram servo as shown in the picture above. Make a hole of the wing root rib for servo cable to get through. You also need a Y servo extension to connect both aileron servos together. Put horn and pushrod like the picture above
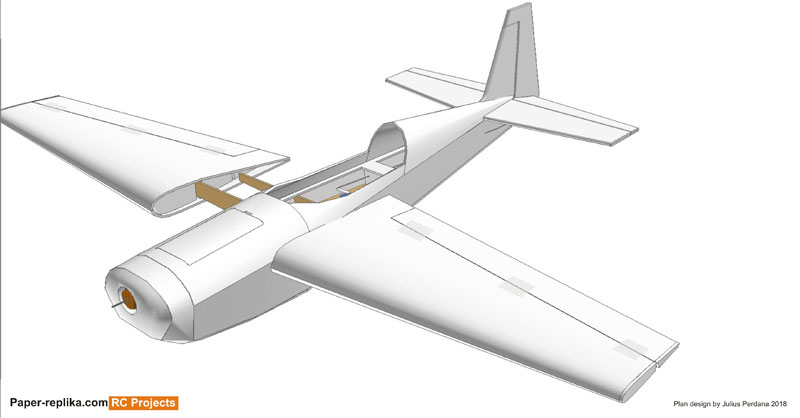
Apply glue both plywood spars with styrofoam glue, so they will not cured fast. Make a hole on the fuselage inside the wing fitting for servo cable to get through. Insert servo cable from the wing to that hole, connect with Y cable inside the fuselage and connect to RX in the front. And then apply glue on the edge of the wing root and them secure the wing to fuselage, repeat that steps on the other wing.
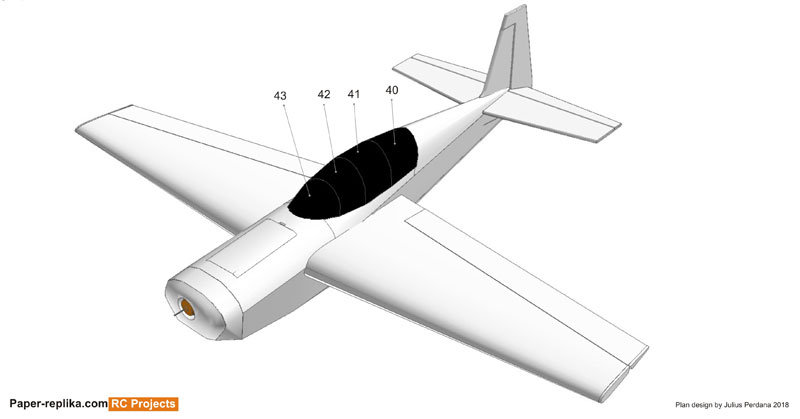
On the plans you can use opaque canopy from foam like on the picture above. Paint black or dark grey for scale looks.
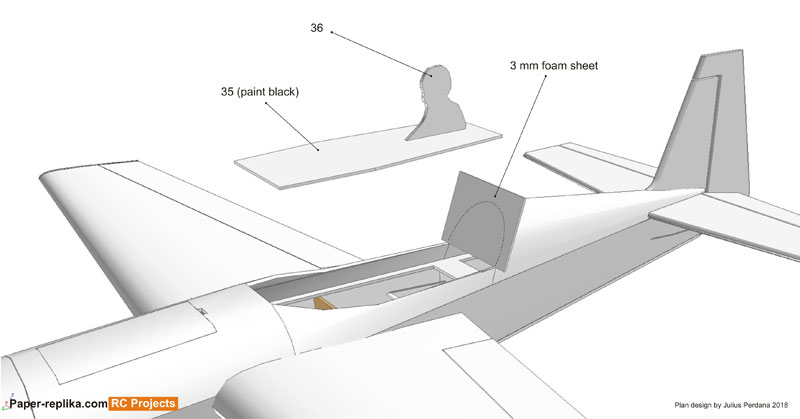
Or you can use clear canopy by using vacuum forming or PET bottle molding method. I will cover on how to do it on the next tutorial video on my Youtube channel. Put cockpit deck (35) paint it black, put the 2D pilot (36) on the deck. Trace the fuselage back edge with 3 mm foam and cut it and paint it black too.
Please use this Extra 300 plans for personal use only, Do not use for any commercial purpose.
By downloading the plans you have agree to follow the above terms.
