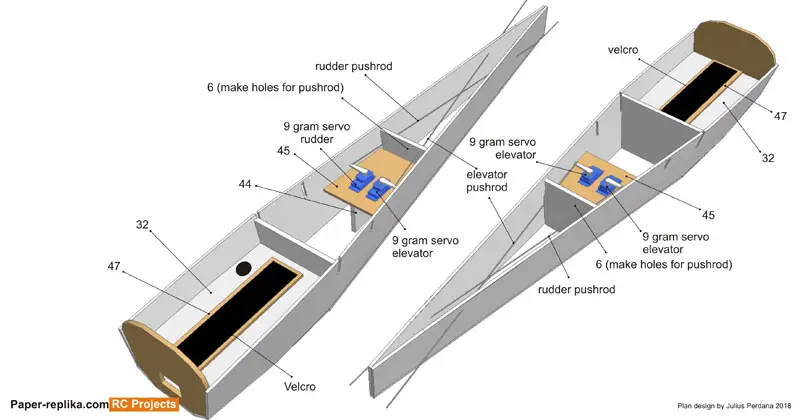
Put part 32 on its place, sand and cut it if it not fit well. Make a hole on the rear right of it for ESC sockets to come out. Put part 47 and glue a velcro strip on it. Those part will be a platform deck for Lipo battery and RX. Put pat 47 and then put servo platform deck (45). Glue 2 units of 9 gram servo inside its 2 holes. Make two holes on part 6 to make way for two pushrods.
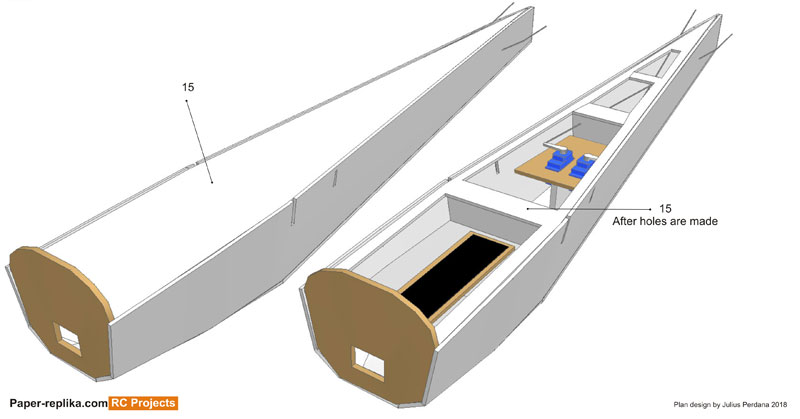
Put part 15 first on its place like the picture above then cut holes respectively like shown in the picture above. You can use cutting knife or solder. Warning, you will broke your solder needle if it use for melting foam/ plastic. So I use a broken solder, or solder that solely purposed just to make holes on foam.
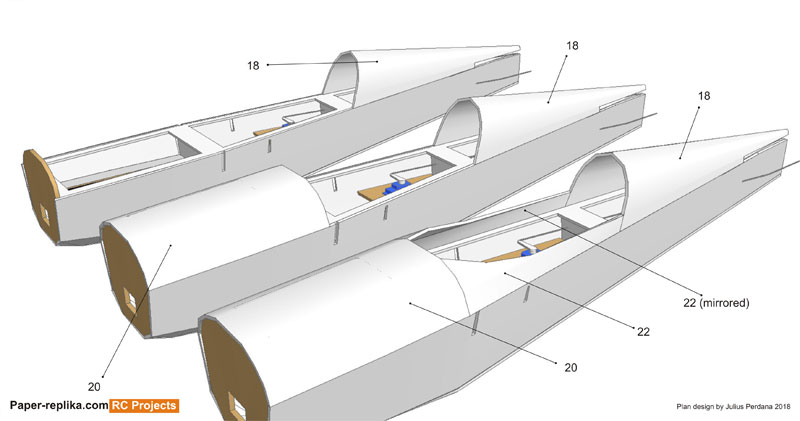
Bend and shape part 18 to become half circle shaped. You can see the tutorial video on how to do it. Then put it on the back part of the fuselage. Then followed by part 20. Don't cut the hatch door yet. Finally put both part 22 on the middle. Make sure all parts are already bended before attaching to the fuselage.
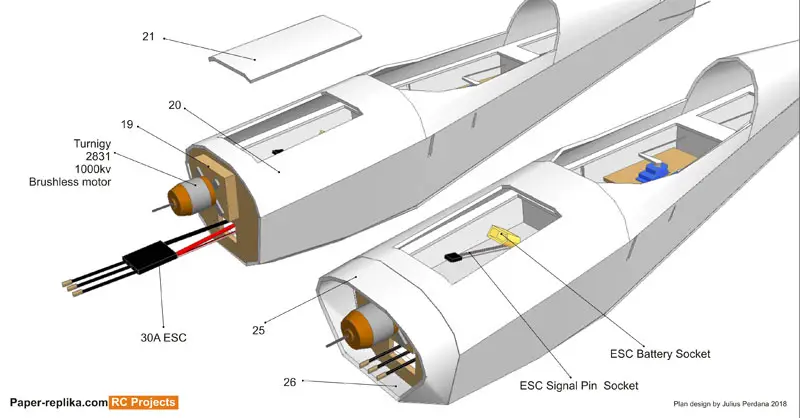
Cut the hatch door on part 20. Attach part 19 which made of 9 mm plywood. Install the motor, I use Turnigy 2831 1000kv brushless motor. Insert ESC into a hole on firewall, pull up signal and battery cables through a hole on battery platform deck. Connect ESC to the motor and check motor rotation with a servo tester and a lipo battery. If it correct, continue by attaching cowl parts (25 and 26).
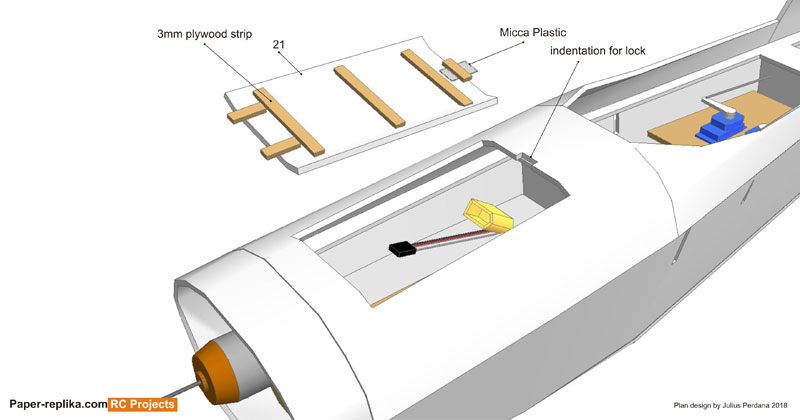
Reinforce the hatch door with plywood strips like shown on the picture above. And add mica plastic to be its notch lock. See video tutorial on how to make the hatch door lock. Also make an indentation for the lock, also see the detail on how to do it on video tutorial.
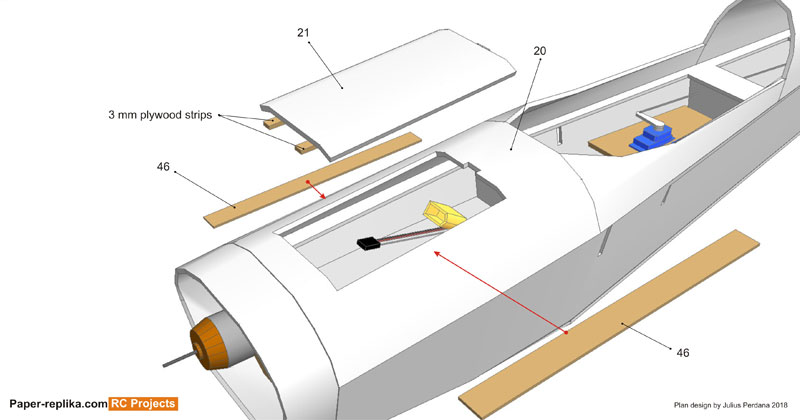
Reinforce part the battery hole with plywood strips (part 46). Place them on inside of the hole edges.
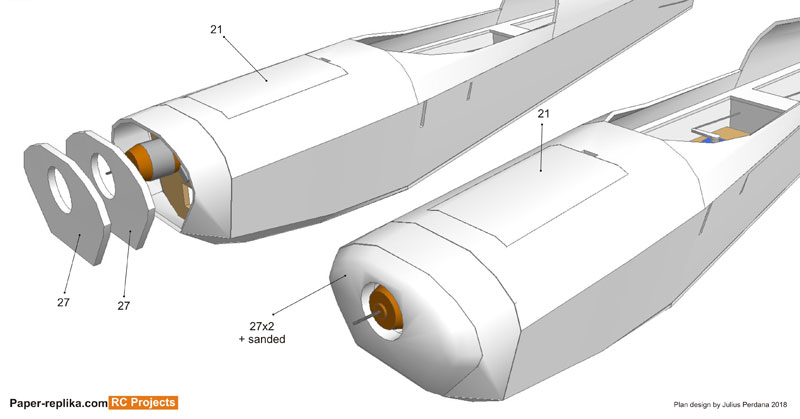
Close the cowl with 2 copies of part 27. Stack them together then glue it to the cowl. When it already set, carve it and sand it to become smooth.
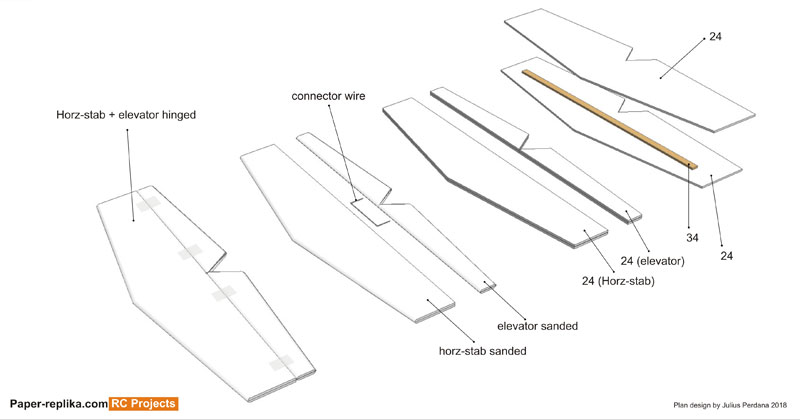
Make a horizontal stabilizer with sandwiching a plywood spar in between 2 copies of part 24. Cut both elevators, connect them with a steel wire. And then sand all the edges to became smooth. Hinge the elevators with packing tape, you need to cover them first before hinge them. You can use packing tape to cover the plane, I use Oracal 651 vinyl sticker.
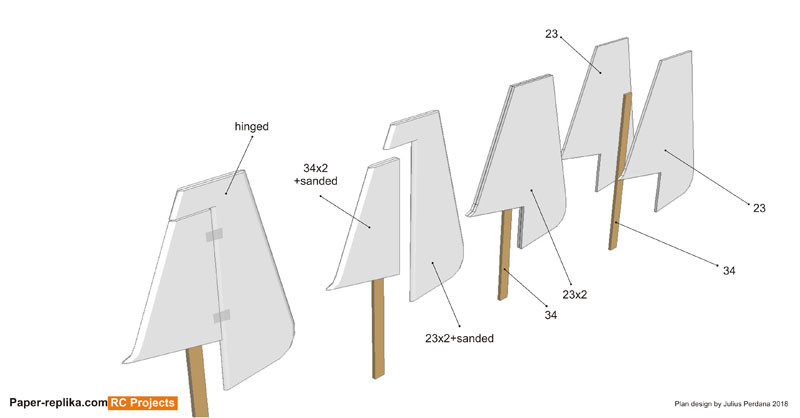
The similar way also go to vertical stabilizer. Insert a spar in between part 23. Cut the rudder, sand the edges, cover them and finally make hinges.
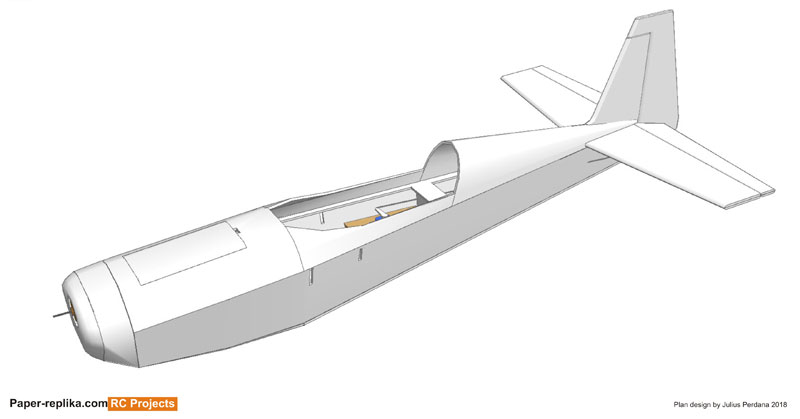
Cover the fuselage with packing tape or vinyl sticker, also cover both stabilizers. Attach horizontal stabilizer first, make sure it is center and perfectly leveled. And the insert the vertical stabilizer, you may need to make holes on back of the fuselage and on vertical stab to make way for vertical stab spar to make through to the bottom inside the fuselage. Make sure vertical stabilizer is perfectly center and 90 degree angled then fix it with glue. Also attach rudder hinge to the fuselage.
Please use this Extra 300 plans for personal use only, Do not use for any commercial purpose.
By downloading the plans you have agree to follow the above terms.
