
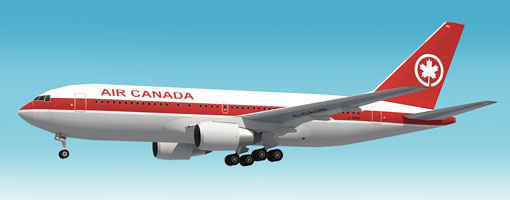
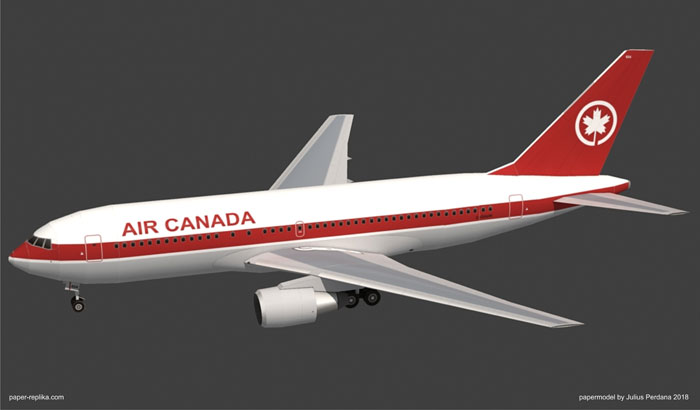
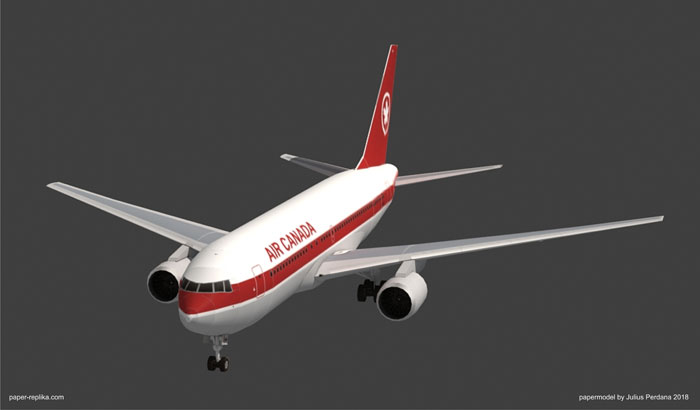
I watch about this infamous "Gimli Glider" many times in Nat Geo channel Air Crash Investigations episode. Many says it's the miracle landing before Sully, which also safe landed. The Air Canada case in my opinion is pretty similar with Sully's case, both lost both engines and both glide down and landed safely, one on Gimli Airstrip and one on Hudson river, but Air Canada flight 143 started on much higher altitude (41,000 feet) which give the crew more time to think. The key part is the sideslip manuver by pilot Captain Pearson, to slow down the plane before landing. The papermodel is in 1:100 scale.
BUILD INSTRUCTIONS :
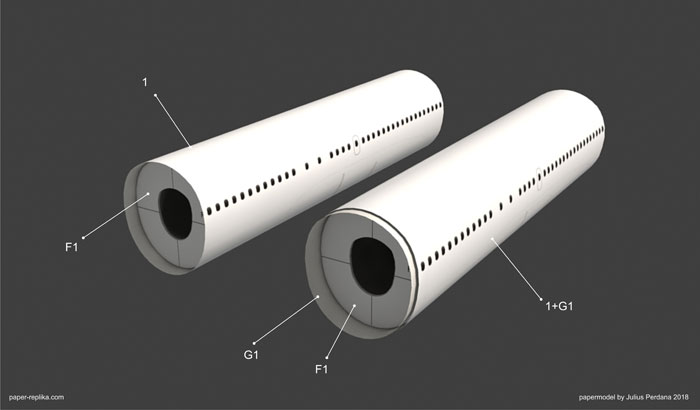
Roll and make a tube shape of part 1 and then insert 2 formers (F1) on each ends, leave some space for the inner glue-tabs (part G1).
BUILD INSTRUCTION TO BE CONTINUED TO the NEXT Page
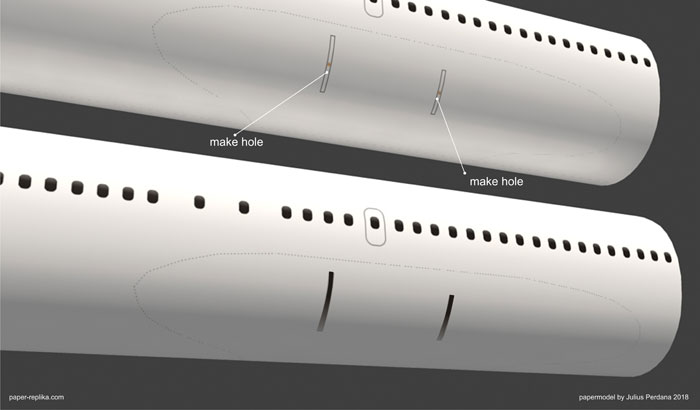
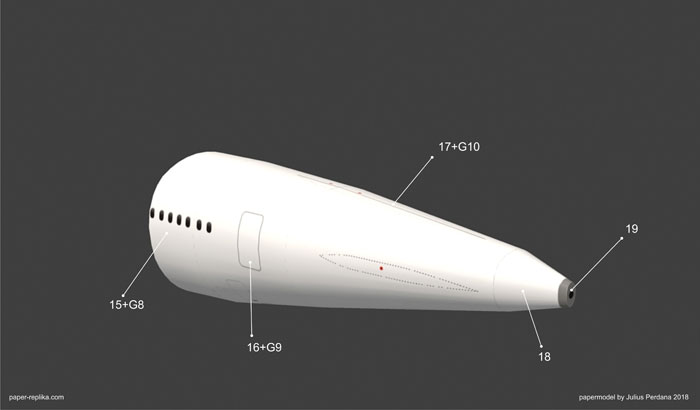
Slit for make holes on the belly of part 1. Use a sharp hobby knife. You can cut it before or after it rolled.
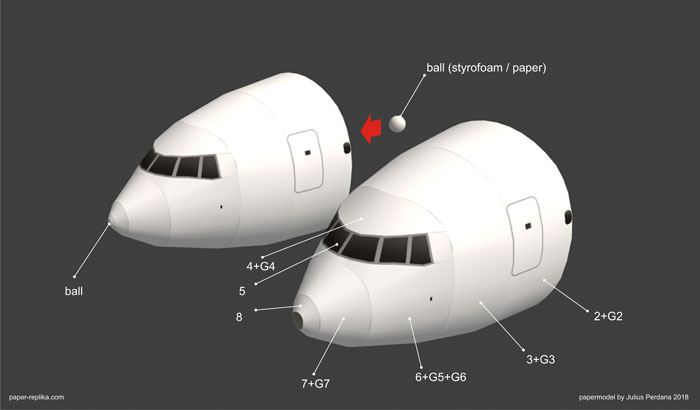
Combine the nose section by attaching each parts with its inner glue-tabs. Insert a ball of paper or you can make it with ball of styrofoam inside the tip of the nose cone. This method is a new way for making the nose tip.
Combine the tail section by attaching each parts with its inner glue-tabs.
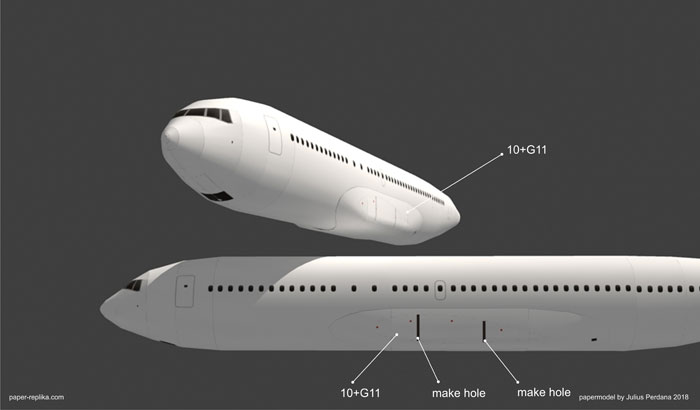
Shape part 10 into a belly fairing like the above picture with the help of glue-tabs (G11). Make holes on belly fairing (part 10) to make way of the wing spars to slip through.
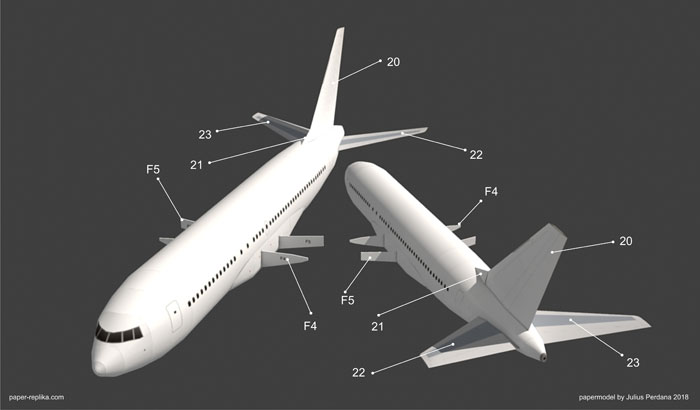
Slip through the wing spars (F4 and F5) in the belly. Make sure all of them are centered before apply glue to fix it. Attach horizontal (22 and 23) and vertical (20) stabilizer on the tail section. Make the angle of horizontal stabilizers a bit upward (dihedral). Make sure you shape all the stabilizers into neat curved hollow structure, but glue the end of it. It must be hollowed or it doesn't have strength.
Attach inner wing parts, place and glue them by following the guide lines on the belly fairing.
BUILD INSTRUCTION TO BE CONTINUED TO the NEXT Page
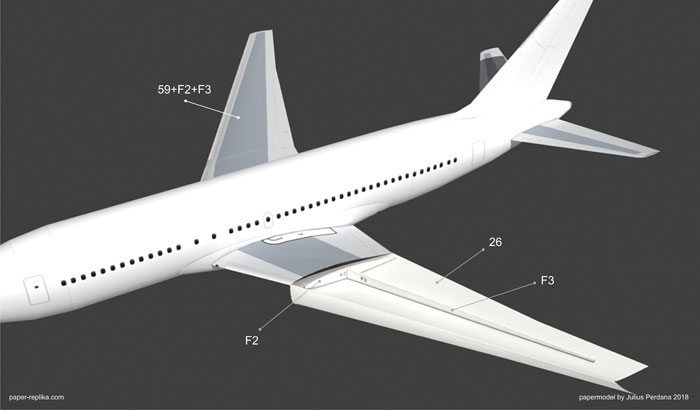
Attach outer wings, but first you have to place 2 formers (F2 and F3) inside each wings.

Attach engine mountings and flap hinges like the above picture
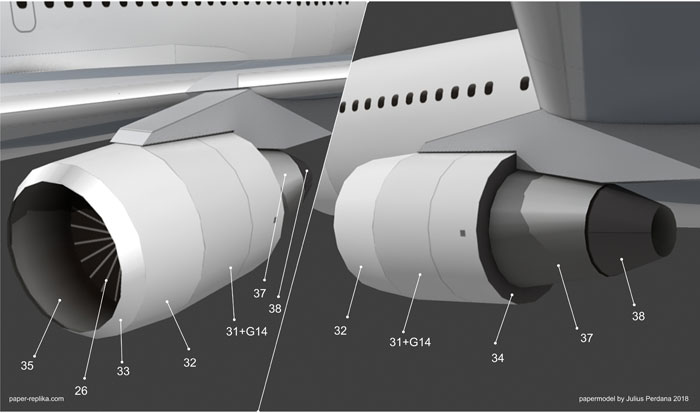
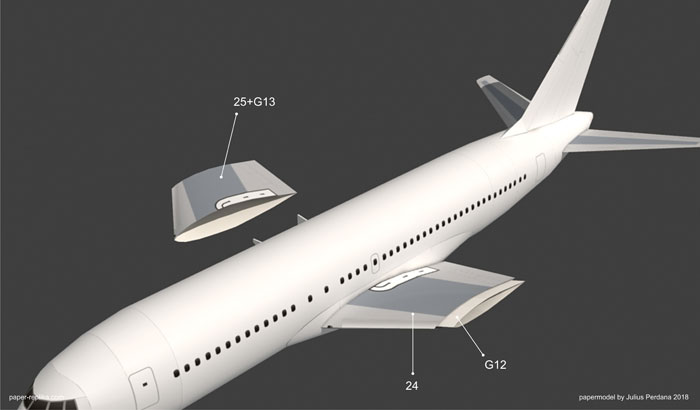
Combine the left engine parts, glue the glue-tab (G14) on the inside of part 31 and then attach with part 32 and part 33. Combine part 26 and 35 and then insert it inside part 33. Close the engine nacelle with part 34. Finish it with part 37 and 38. Make sure all seams are on the bottom and align them with the engine nacelle's seam.
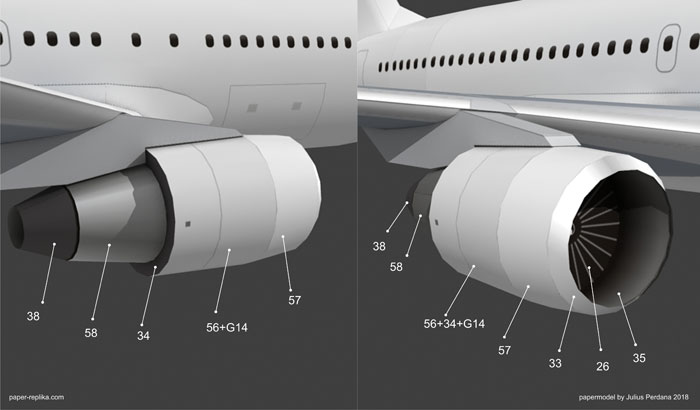
The right engine parts are almost identical with the left one, but with some parts mirrored. Make sure you show part 58 with the correct reflection texture on the side.
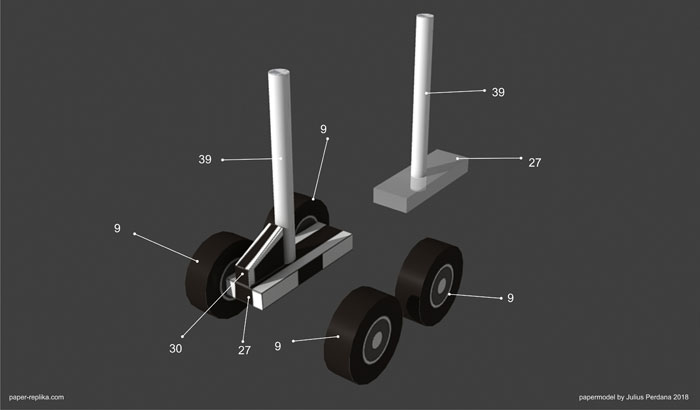
Slip through part 39 inside to the bottom of part 27. Attach all 4 wheels (9) on each sides of part 27. Attach accessories part 30 on its place.
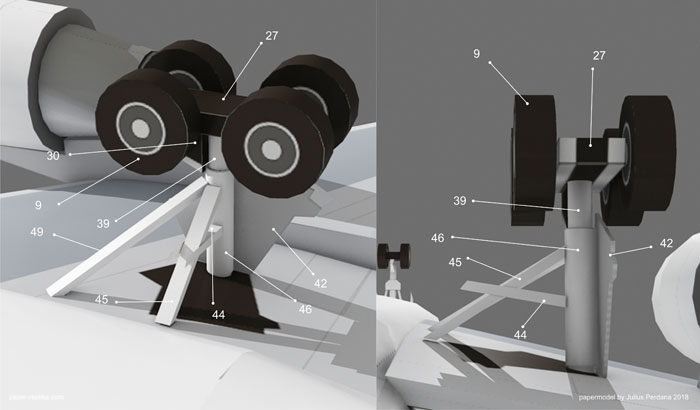
Before inserting the previous landing gear set inside the wing, attach all accessories part first.
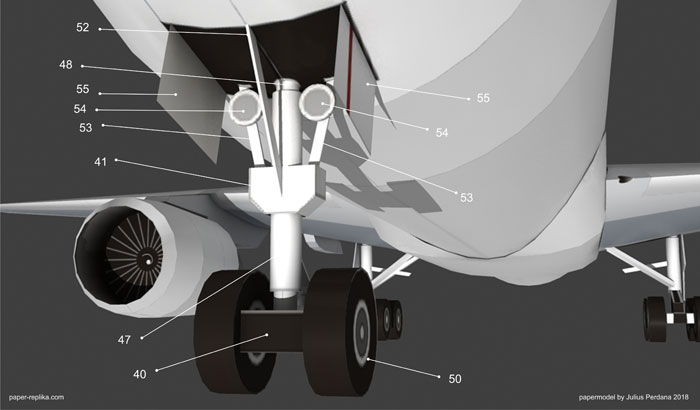
Before inserting the front landing gear set inside the wing, attach all accessories part first.
HAVE FUN!
Document license
You may freely distribute or give away these paper models to others without prior permission from the designer, you may modify with the credit to paper-replika.com. Feel free to add any of these paper models to your website or blog, with the link to paper-replika.com model pages. Do not use direct link. Uploading to mass file storage for public view is forbidden, including, but not limited to, rapidshare, mediafire and others which provide similar service. All images are copyrighted. Permission is granted ONLY for non-commercial personal use. They may not be duplicated in any form, including electronic, mechanical or printed, for sale. All rights are reserved and duplication by any means,including, but not limited to, methods of printing, electronic storage and disk copies, is prohibited without permission. If you wish to use this artwork and instructions for other than your own personal use, like for a club contest or school program,PLEASE contact paper-replika.com for written permission.
This work is licensed under a
Creative Commons Attribution-NonCommercial-ShareAlike 3.0 Unported License.

No Warranty is provided whatsoever. This material is provided on an as-is basis with no support and no warranty. All real life objects belong to its respective owners and designers.
This pattern never been tested, some minor errors were found in several of previuos models, please be advise maybe you will find errors such as missing tabs or unnecessary tabs, despite the models never been tested, many have succeeded build all of them perfectly, just need little imagination and dedication to this hobby.
To download this file you DO NOT NEED to be registered as a member, Registration whatsoever needed to join paper-replika.com FORUM and to give comments on articles. Paper-replika.com NEVER share your identity or sale to third party, and it will be kept safe.
We use third-party advertising companies to serve ads when you visit our website. These companies may use information (not including your name, address, email address, or telephone number) about your visits to this and other websites in order to provide advertisements about goods and services of interest to you. If you would like more information about this practice and to know your choices about not having this information used by these companies, click here.
PASSWORD : paper-replika.com (case sensitive)
Open PDF file with Adobe Acrobat Reader, PDO with Pepakura Viewer.
The assembly instruction is not include with the file that you are about to download. You can find the assembly instructions of this model with just go back and browse previous page.
Agree and download Boeing 767-200 Air Canada Papercraft Template