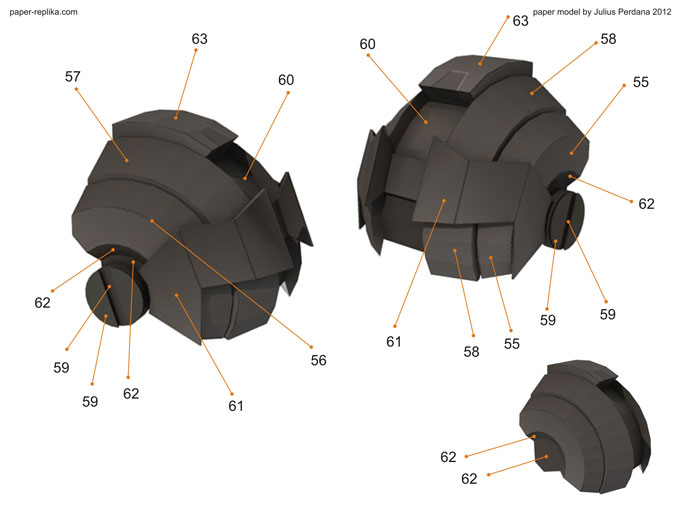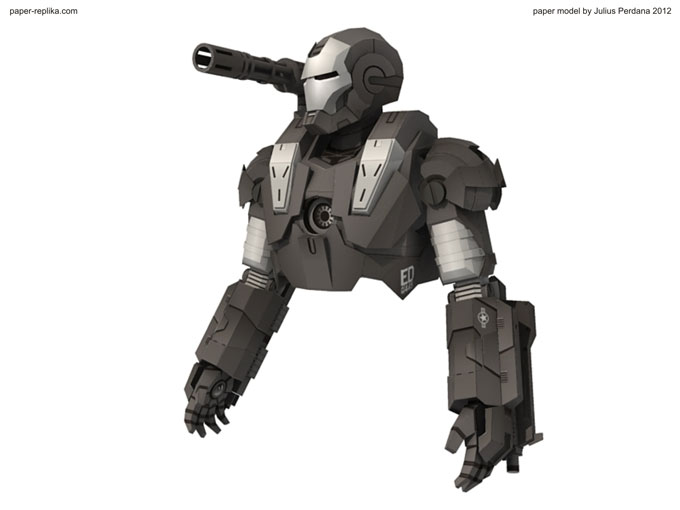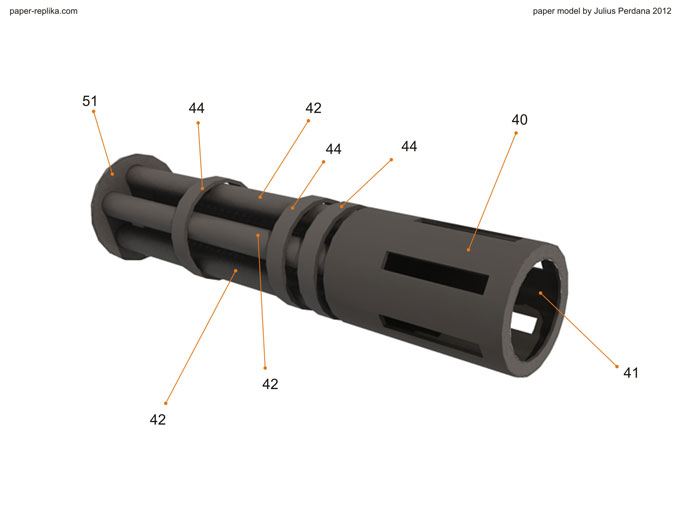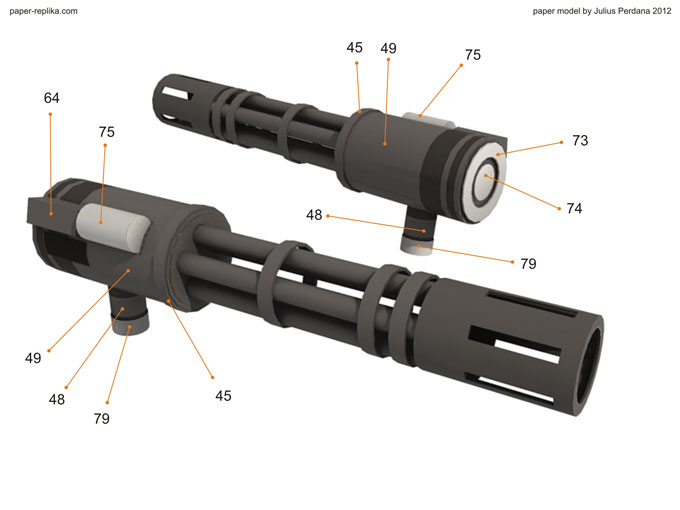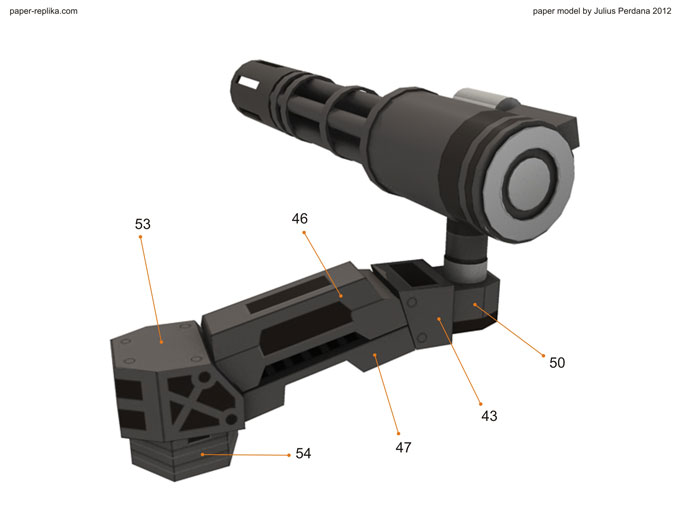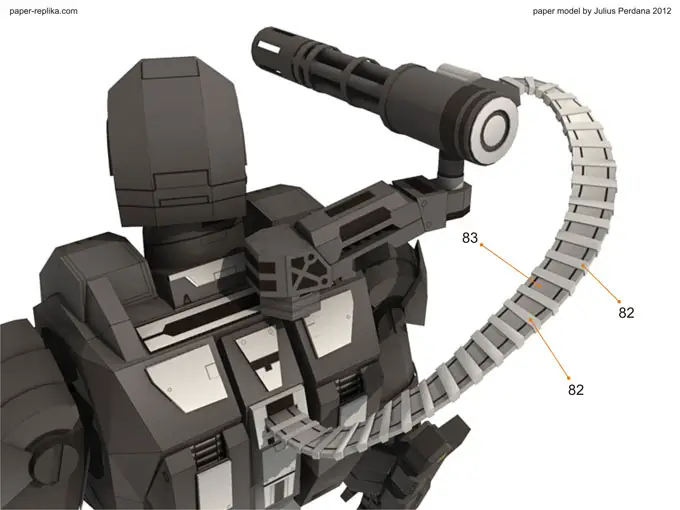
Finally arm and gatling gun for Iron Man War Machine (WM) is ready after more than a month without any update. It because I was preparing for PERI exhibition on the latest Toys and Comic Fair 2012 in Jakarta, for almost two weeks I didn’t making any template and last week I had a system failure on my PC resulting to re-format my Hard drive, that was also delay this WM progress. As usual I release in two template version, colored with 4 pages and blank one with 5 pages. In 1/6 scale the parts are very small but still can be build. In the last minute before finishing the template I re-examine all pages and found out there were some glue tabs/ flaps that were too small and I have them removed, and some parts have to be simplified because of the size of them, that alone took hours to be repaired. You have top follow all instructions step by step in order, because there are key steps which crucial to be taken in attention.
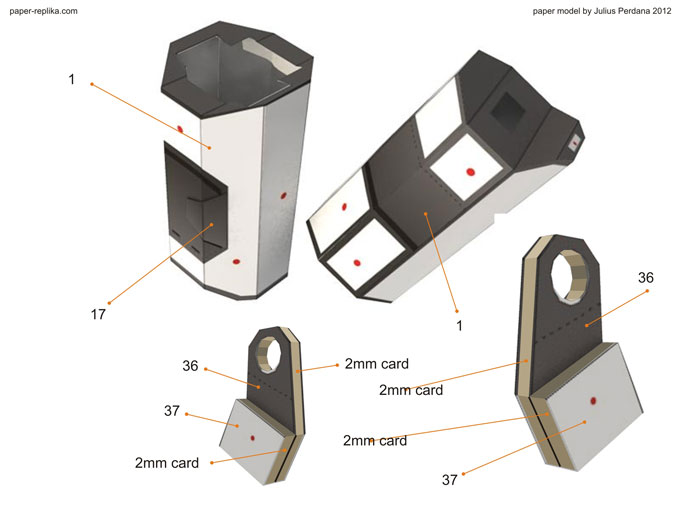
By using 2 mm thick card board layer part 36 with it then attach part 37 also with 2 mm cardboard on top part 36. We need 4 of this part, 2 pairs left and right for both arms. If you can't find 2mm cardboard you can use 2 layer of 1mm then stack them up ro achieve 2 mm thick. Don't forget to attach part 17 in its place on top of part 1.
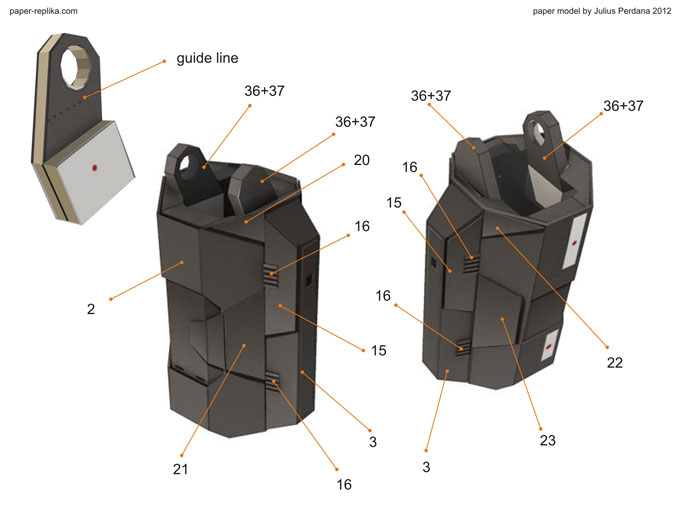
. Wrap around part 1 with part 2. Place part 36 with 37 combined in part 1, use the guide line to align the part so the part below the guide line will be inside part 1
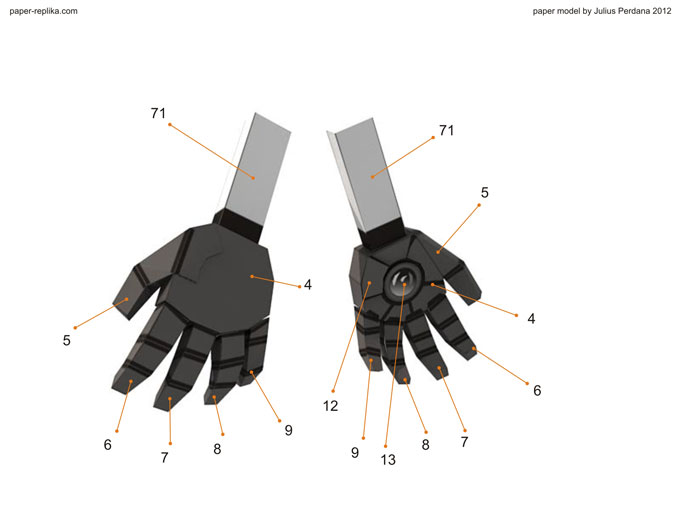
There will be two version of hands, this is the first one the other one, the closed fist will be released on the next part. It can be interchangeable.
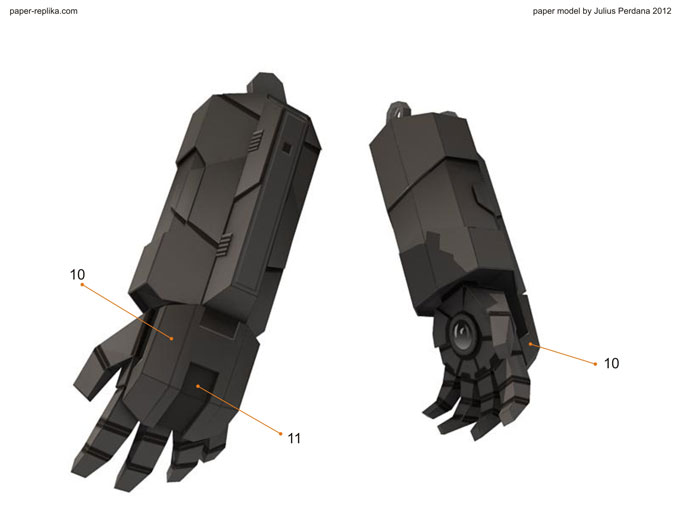
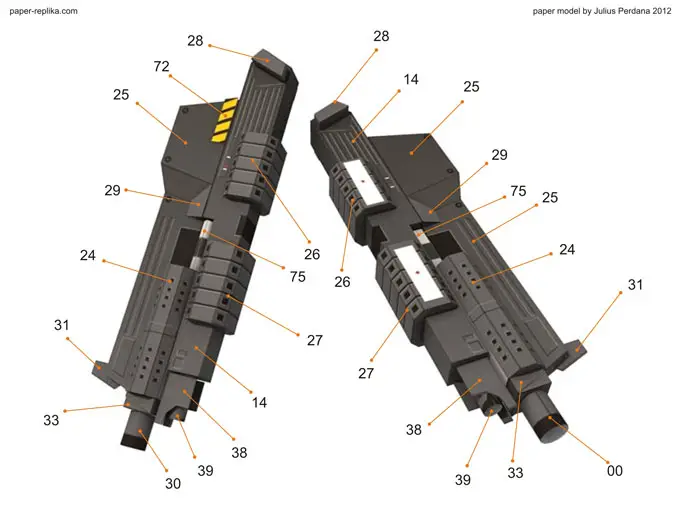
In this instructions you will find slightly different parts in shape compare to template, It is because I have to simplified all the tiny parts. The parts I am talking about are part : 26,27,28 and 75
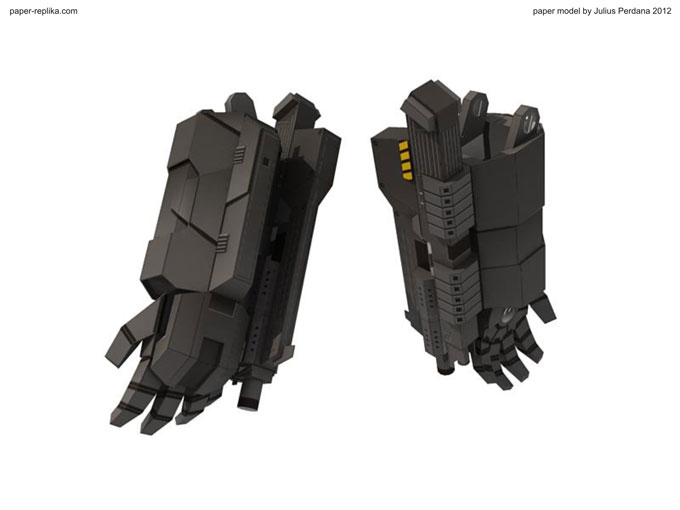
Place the machine guns on the back arm
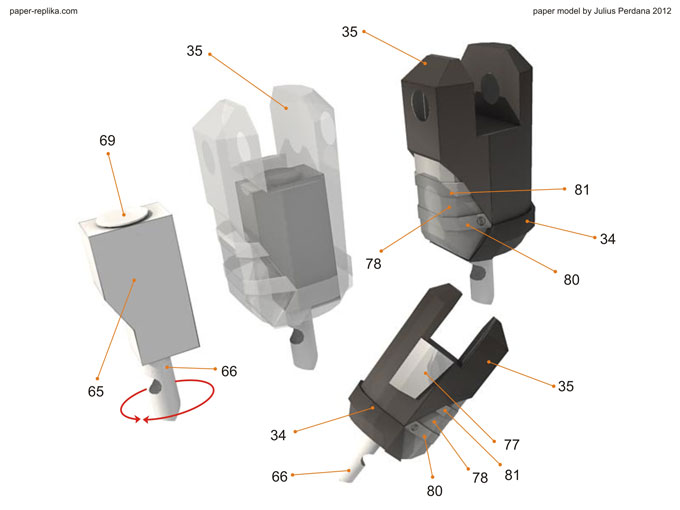
assembly first part 65,66 and part 69. Part 66 has to rotate-able freely. Glue part 69 with 66, don't glue with part 65. Place the joint mechanism inside part 65 from the top before you close part 65.
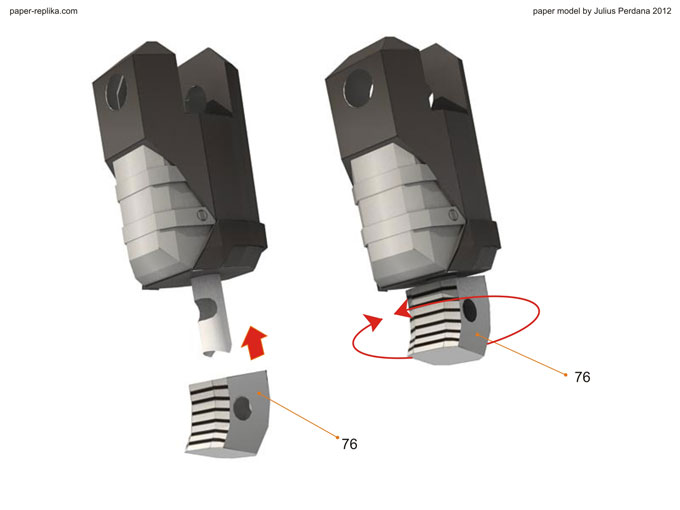
Assembly part 76 them attach and glue it with part 66 so part 76 will be rotate-able.
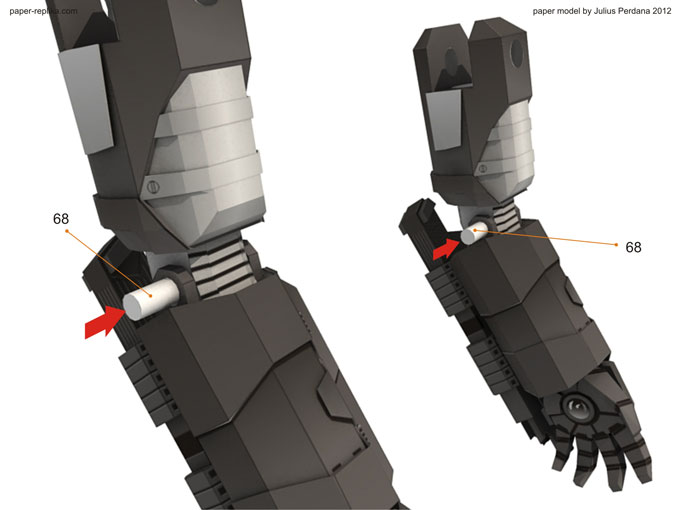
Reinforce part 68 by stuffing with rolls of paper then hardened it with super glue, or you can replace part 68 with any material with the same size, the stronger the better.
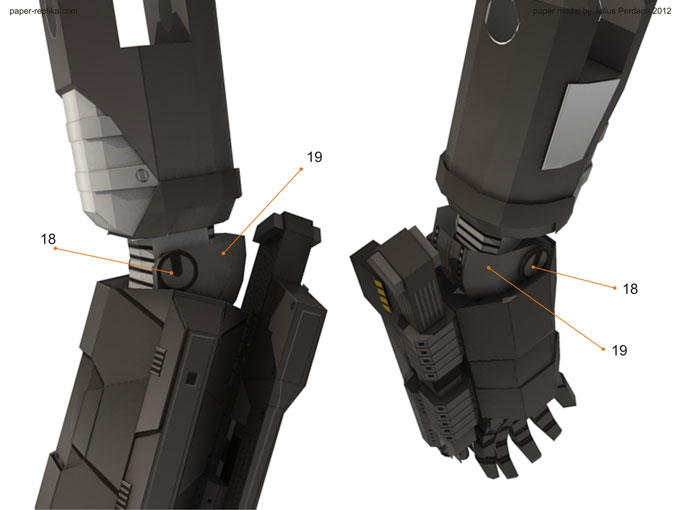
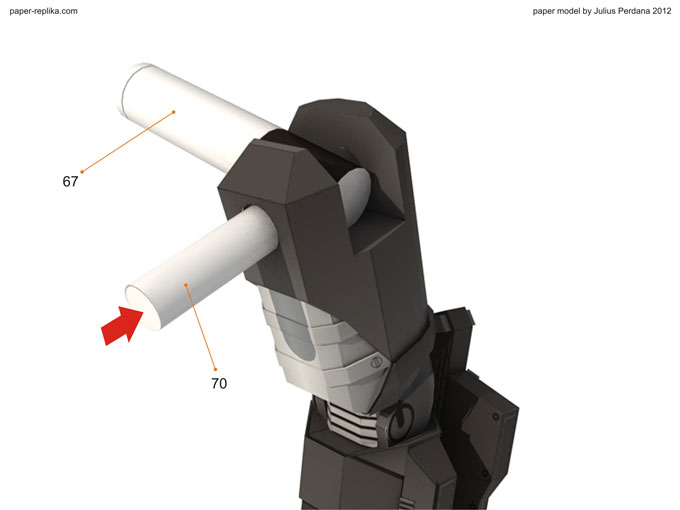
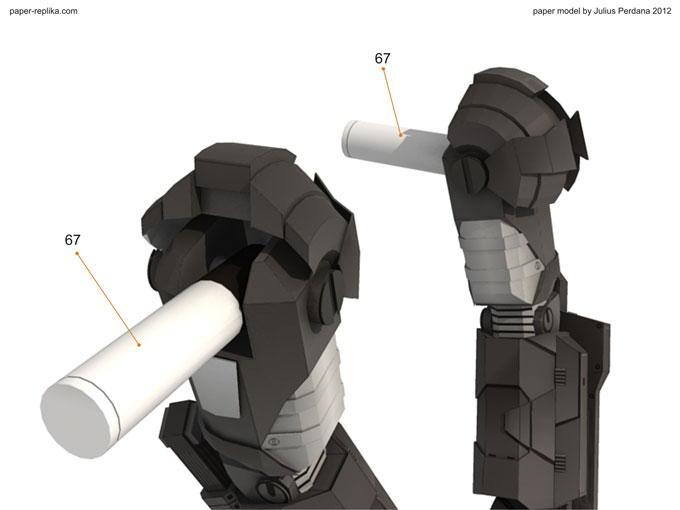
Reinforce part 67 and 70 by stuffing with rolls of paper then hardened it with super glue, or you can replace them with any material with the same size. the stronger the better.
