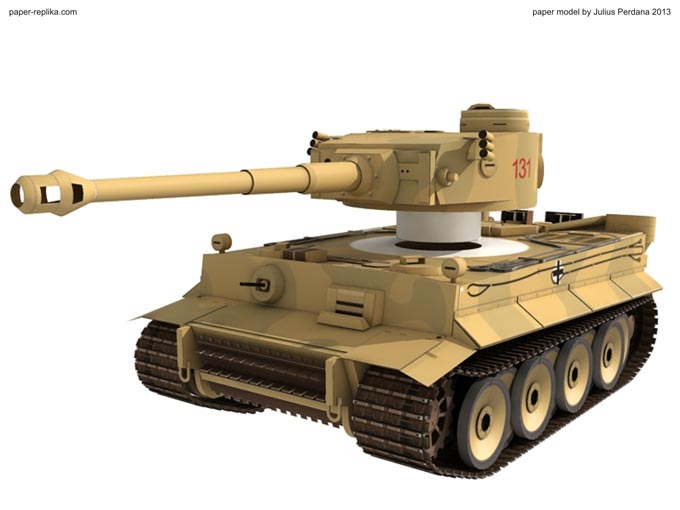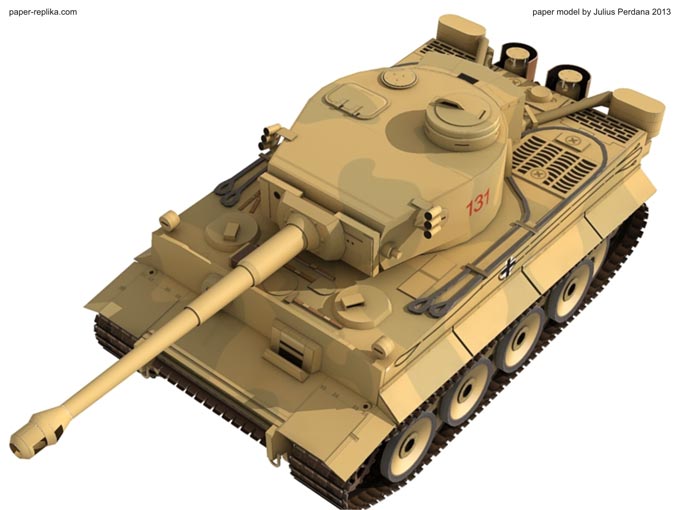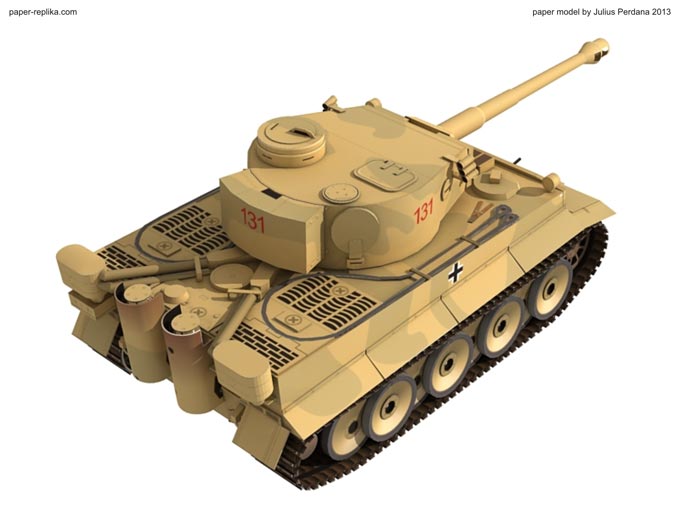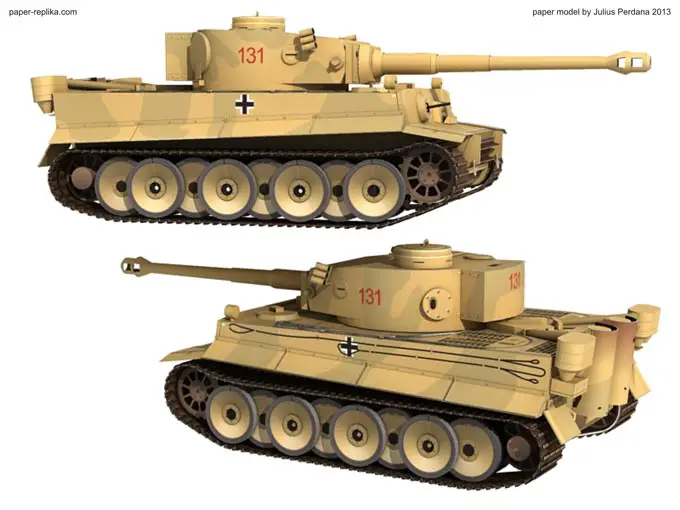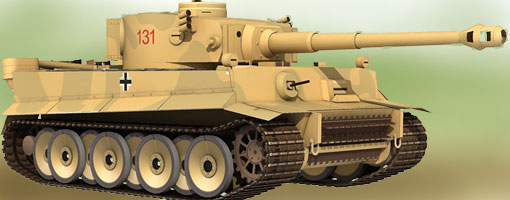
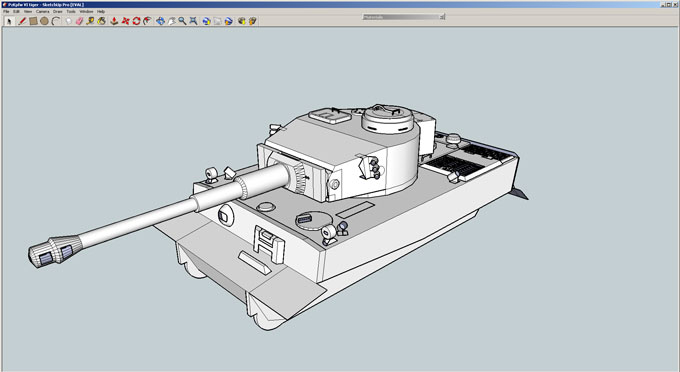
I made this model tank as a tribute to my fellow paper model designer as a hobby, Yudhi Kistyarto. His last work in progress was this Tiger tank as you can see on the screenshot below, that's his actual work on Tiger tank 3d model on Google Sketchup. He never got a chance to continue it, he passed away a year ago. I got this file from Christopher (Bamboogila Corner), Yudhi shared it to Chris for learning purpose, back then. When Chris informed me that he got Yudhi's file, suddenly I had an idea to continue Yudhi's work. I planned to make a simple Tiger, but apparently I can't help it to make it a little bit detail, so the final result is a semi detailed model. The scale is 1:35, not too big nor small, just right I think. I simplified the wheels, so the inner row wheels that are not visible are not modeled, just the visible parts. The tracks come in 2 options, detailed and simple, it's your call. Its turret is rotate-able, but its cannon angle is fixed on level position. I choose Tiger 131 from Bovington museum, United Kingdom as the color scheme, because that Tiger is the only Tiger I tank that still can be running today, the only one, so I think that's special. Other colored scheme also opened for the next projects when the master patterns is done.
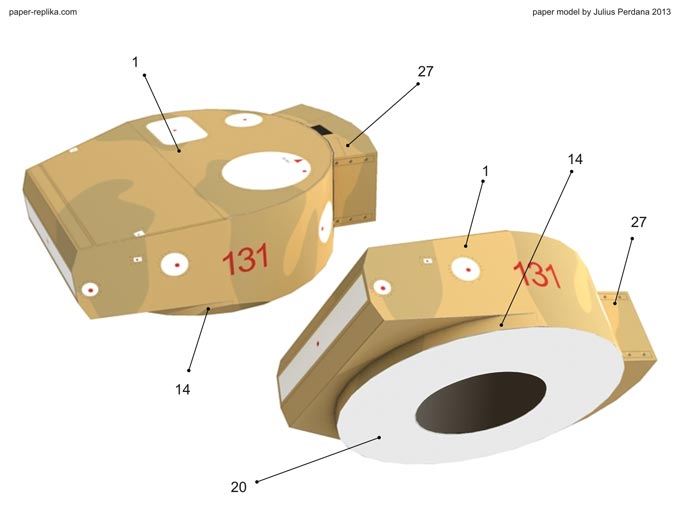
Assembly turret base (part 1,14 and 20) then combine it with turret compartment (part 27).
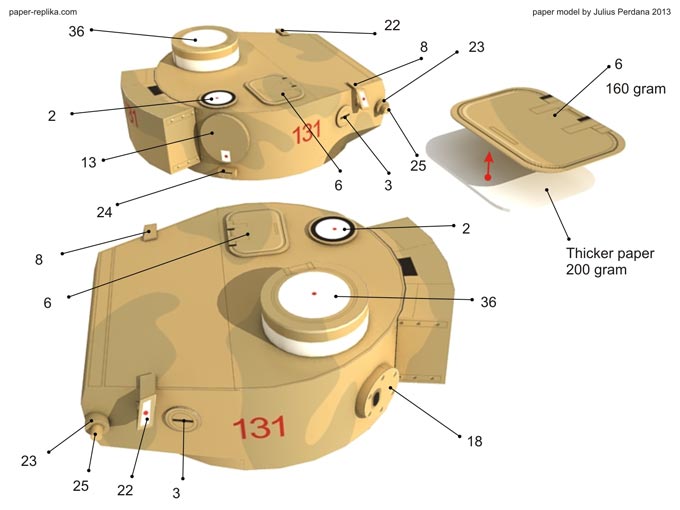
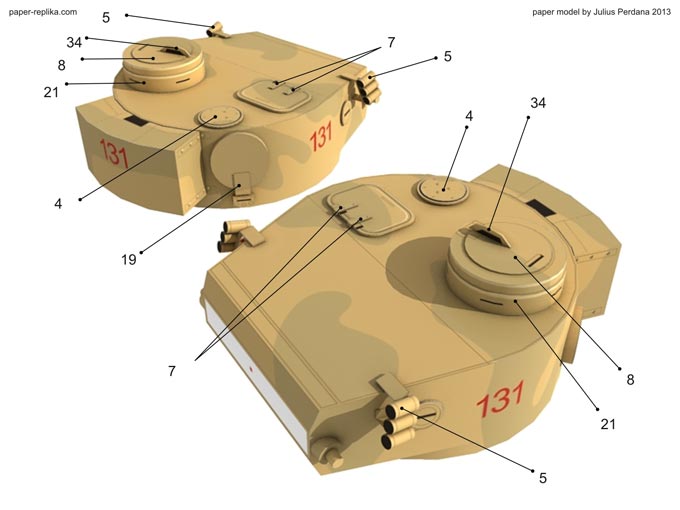
Add more turret details on top and both sides of it. Watch for (!) symbol, it means layer the part connected with it with thicker paper. When placing part 36 on top of the turret, make sure you align the seam.
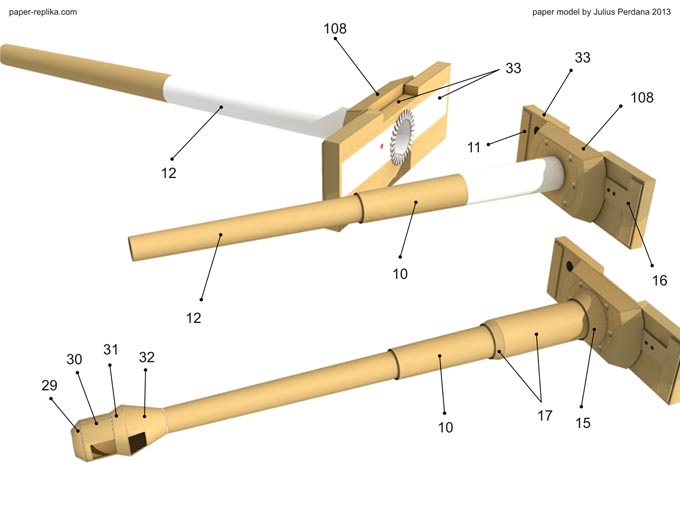
Before assembly muzzle breaker on its cannon, paint on inside with black ink (part 29, 30, 31 ad 32). Assembly the cannon part in order from above.
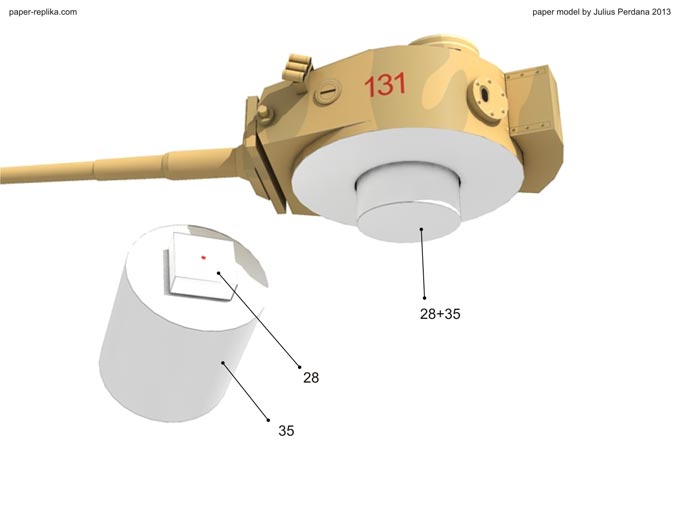
Glue part 28 and 35 and then glue it to the turret from inside. This part will be the rotation axle of the turret.
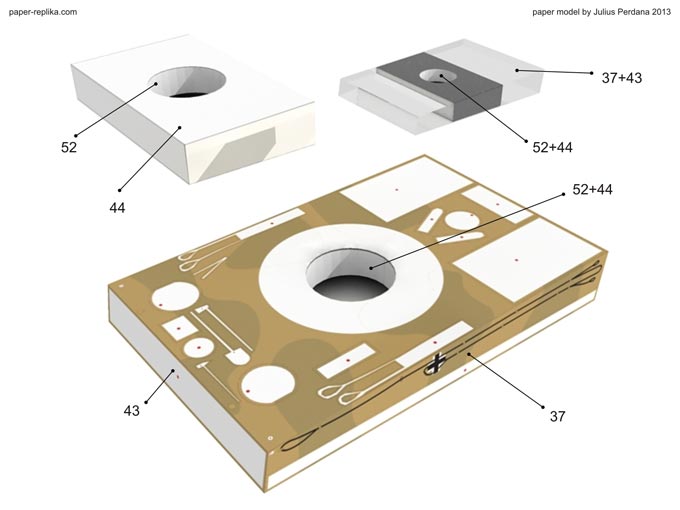
Place part 52 + 44 inside part 37 + 43. This part will be the housing of the turret axle and also strengthen the hull.
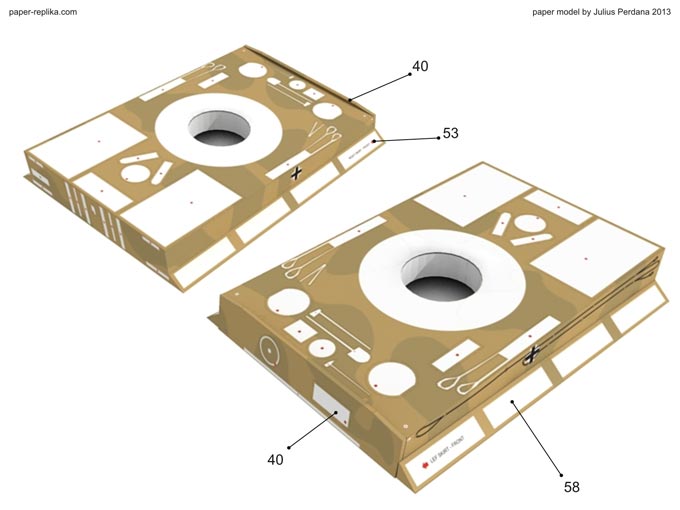
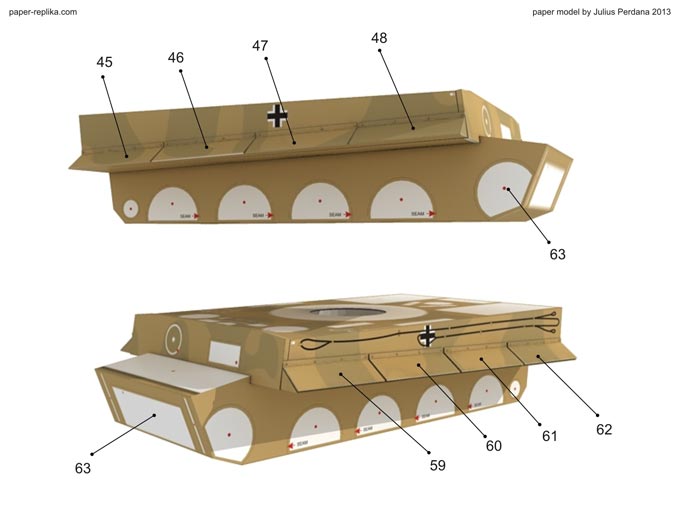
All skirt parts are numbered, by still you have to watch for camo alignment.
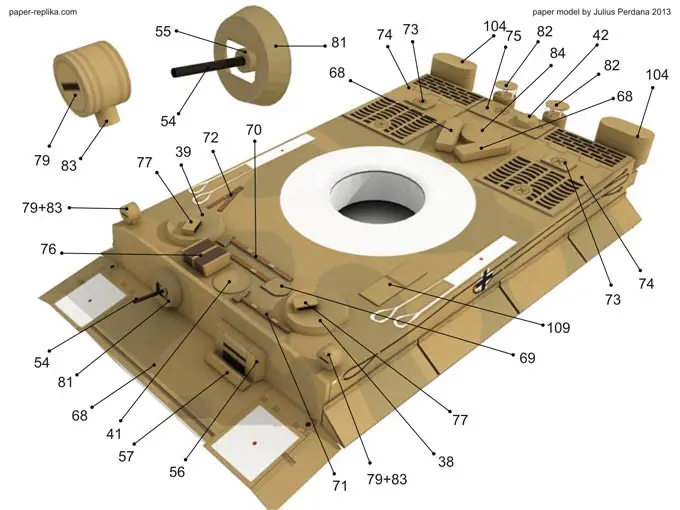
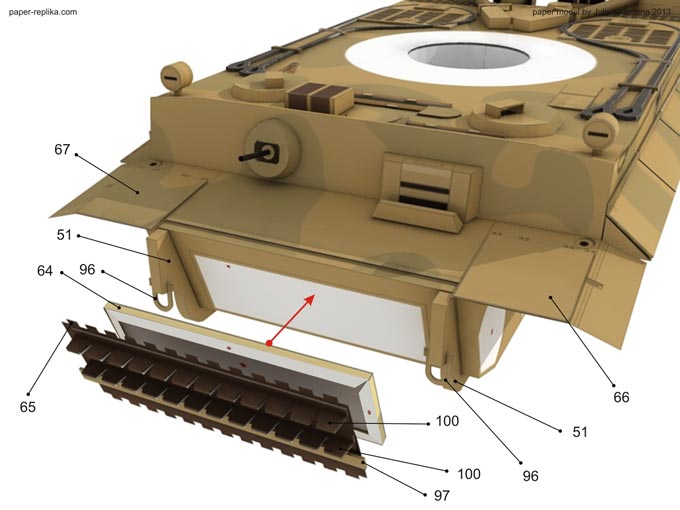
Part 83 on the headlights don't have flaps, because its tiny just roll them and glue them still then glue it on top of the hull, then attach the headlights. On MG42 housing (part 81) you can choose to make a hole or leave it black.
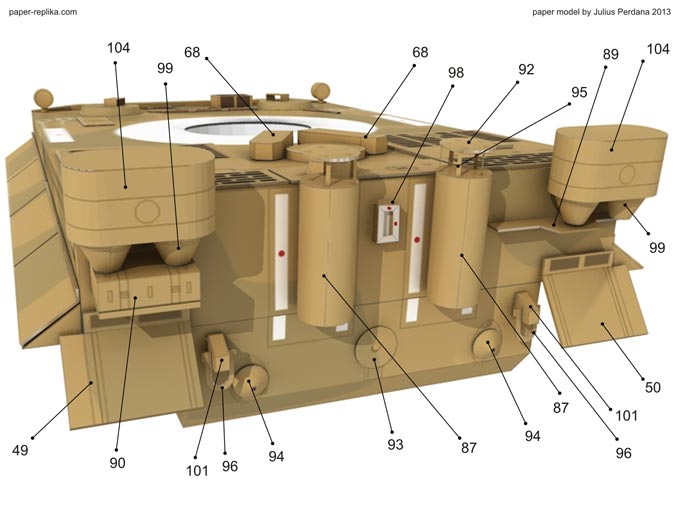
Paint the inside part of part 95 with black or brown ink.
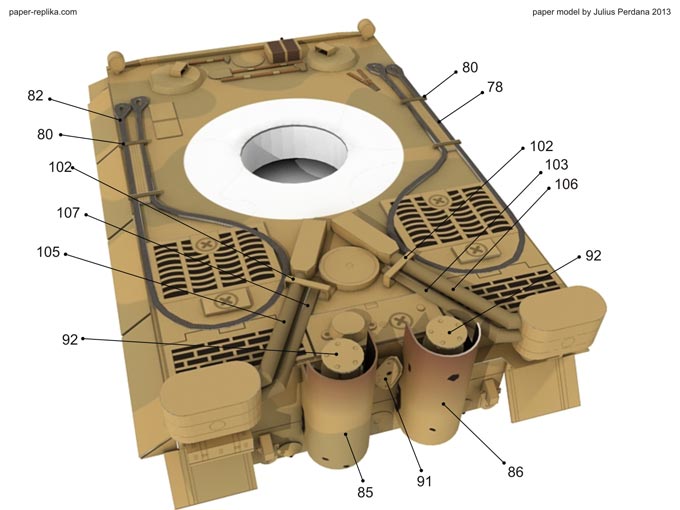
Both exhaust covers have 2 part each (part 85 and 86), one facing outside and one facing inside (black colored)
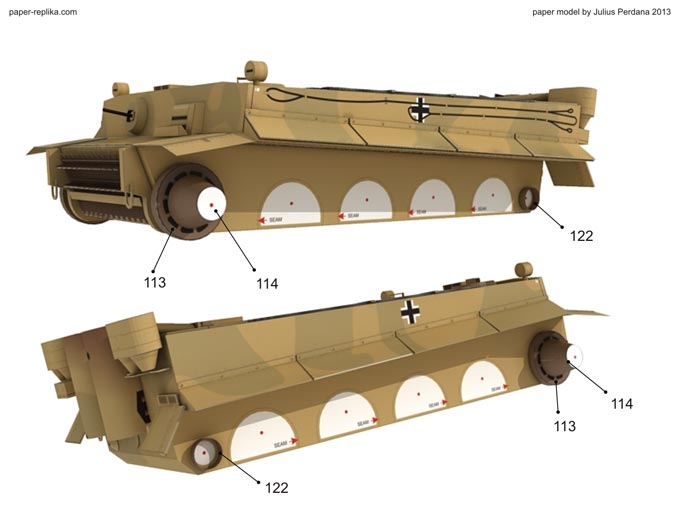
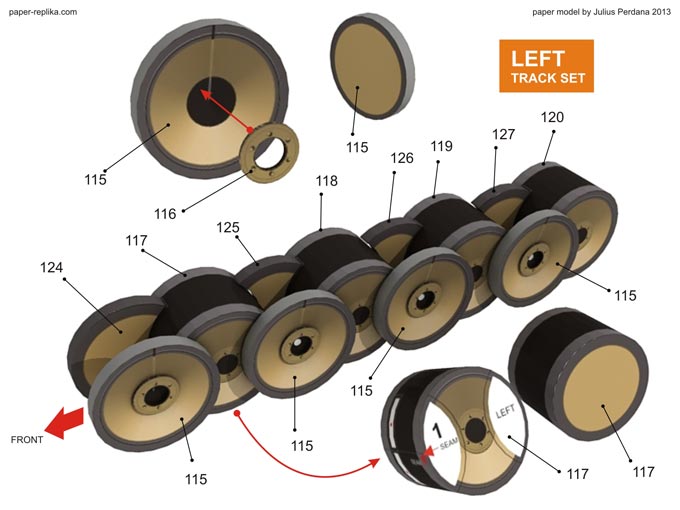
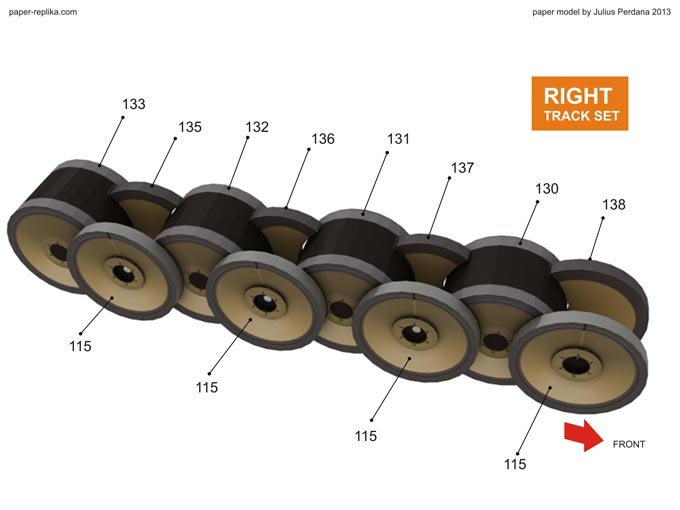
Some left and right track set texture are different (mirrored), so make sure you make the right one. You can choose to make a hole on part 116 or leave it black.
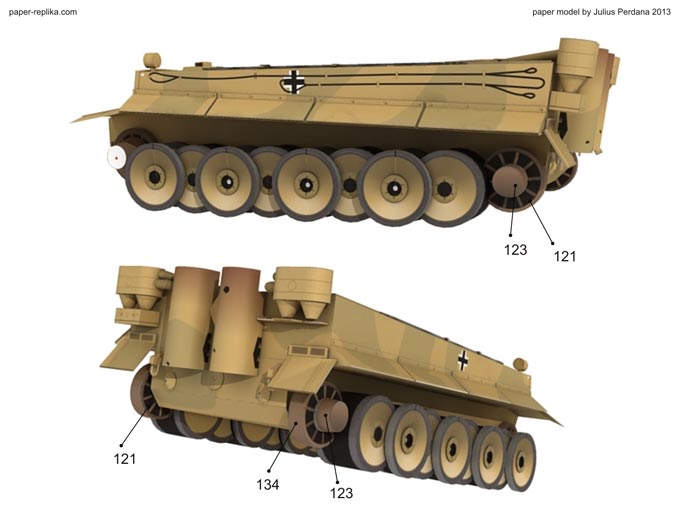
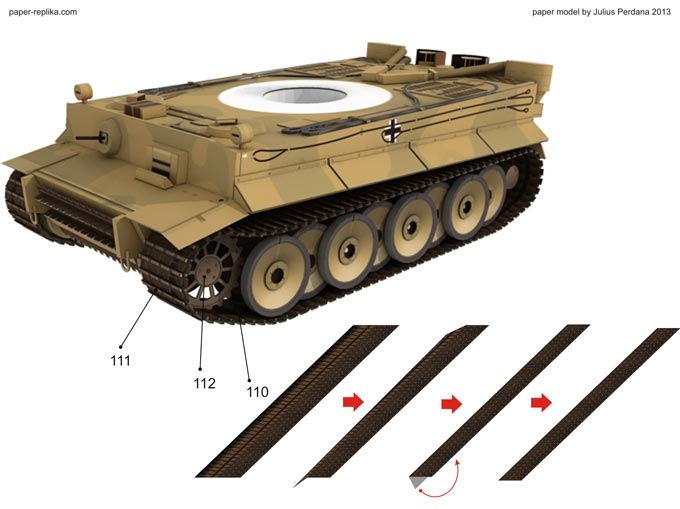
Fold in half and glue to itself in back to back for the track base (part 110 and 129). You can choose to use just the track base or to add additional details for each track (part 111).
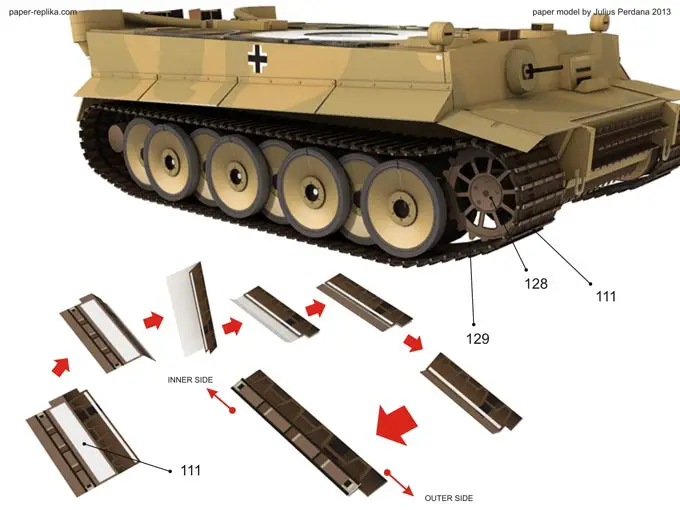
Fold the detailed track part according image above (part 111). Part 111 for left and right track set are different (mirrored). Paint the white edges with black to have better result on the model.
