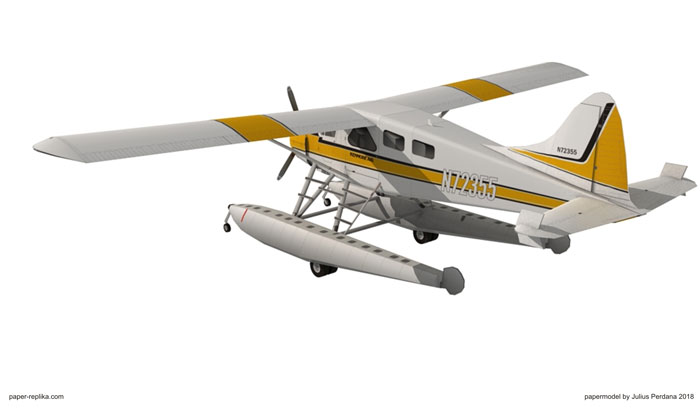

This is my first paper model in 2018 after months in a hiatus. I don't know how to describe it, but it's not a comeback release. I'm still struggling to find a way to make more models as in the past. I can't promise you anything this time. But I was enjoyed designing this template and build it myself after so long haven't got a chance to do it. About a month ago I play so many hours in Microsoft Flight Simulator X for the first time. In the early computer game age, I was into simulator games, like Chuck Yeager Combat Simulation, F-117 Nighthawk or A-10 Tank Killer. All still in DOS format, but when Microsoft Flight simulator came I haven't tried it yet until last month. It was very addictive if I may say, it brings back a joy of flight sim experience, with lots of keyboard commands like the real plane. And then this Kenmore Air DHC-2 Beaver caught my eyes, I have to make a paper model of it, because it's a beautiful plane. I'm also planning to make it flyable as an RC model plane, but first I need to make the paper model first. So here it is, the model is in 1/32 scale. Big enough to have a decent details. The model wing will have about 45 cm wingspan. You need to use 3 type of paper or card, for the main template 160-200 gram card will be good and for the struts and spinner you will need 80-100 gram paper and the last is 1 mm thick cardboard. I also made a new numerical system, the formers will have F letter on the front and G for gluetabs and each elements have the same number, in example if part 4 has gluetab it will be G4 and if it has former, it will be F4. I made a slide show video on youtube about this build, you can watch it here. Please Subscribe my channel of you like :).
ASSEMBLY INSTRUCTIONS :
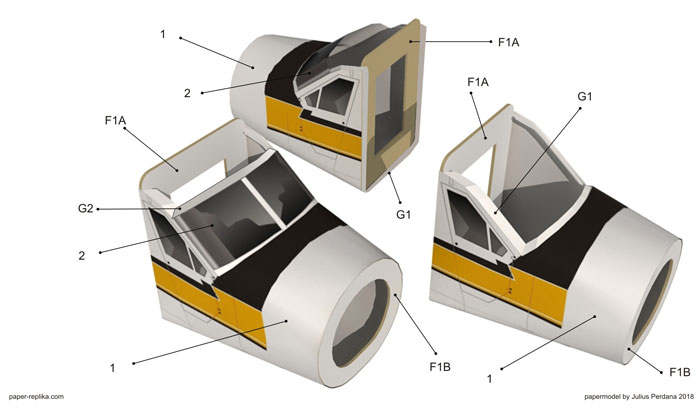
Glue the gluetab (G1) to the back of part 1 and then attach formers (F1A and F1B). Glue G2 onto windshield (2) before attaching it onto part 1.
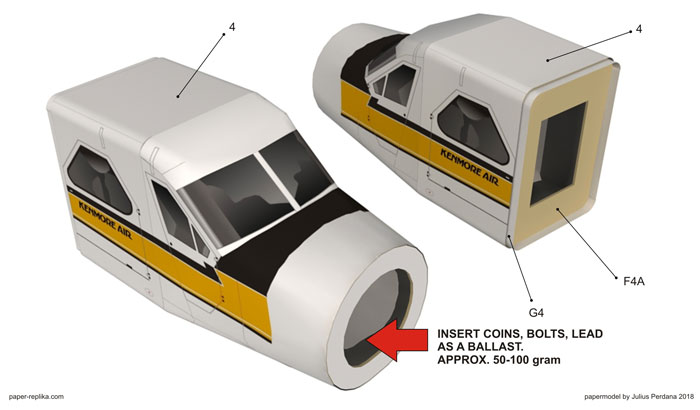
Glue G4 onto back of part 4. Glue part 4 with set of part 1 first, then attach a former (F4A) on part 4.
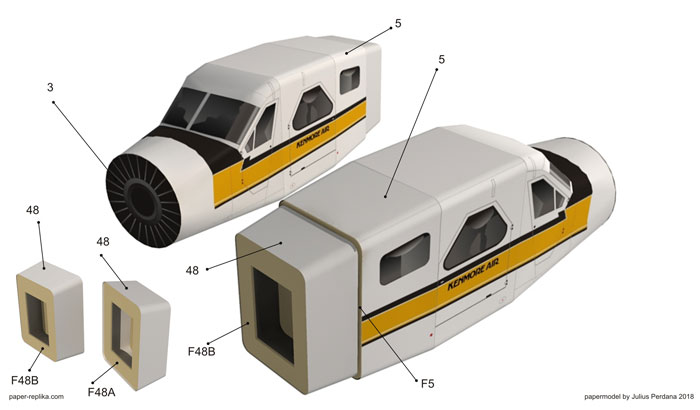
Close the front of part 1 with part 3 (cylinder engines texture). Glue part 5 with the previous part set and then glue a former (F5). Assembly "joint helper" with part 48 and 2 formers (F48A and F48B). Glue "joint helper" in the middle of F5.
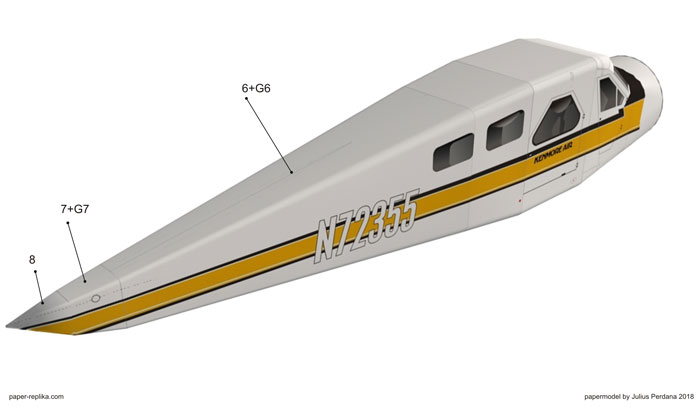
Assembly tail section like the image above. Pierce 2 circles on part 7 and insert a toothpick.
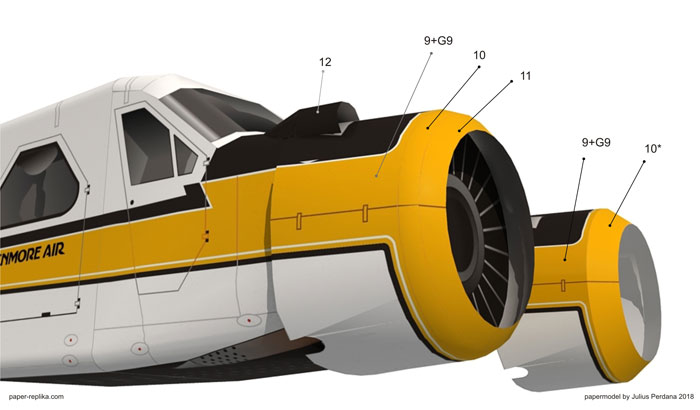
Glue part G9 onto the back of part 9. Assembly the cowl part 9,10 and 11 then glue the air intake (12). You can choose to build an easier cowl with part 9 and 10*.
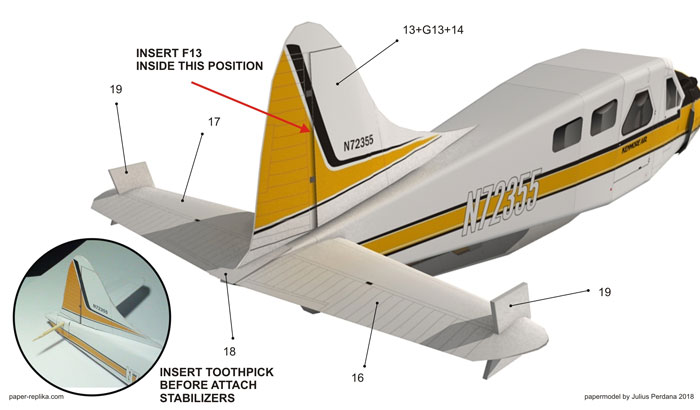
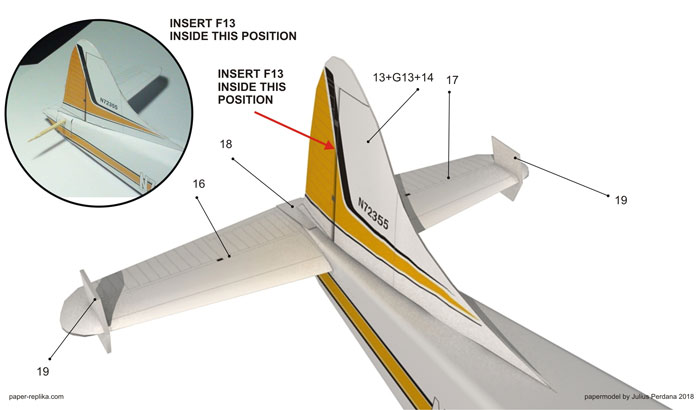
Use a toothpick on part 7 to be a spar for the horizontal stabilizers (16 and 17). When the stabs are in place cut the "black line" on each wing tip with scissors and insert part 19 on each stabs. Assembly the fin (13,G13 and 14) and then insert a former (F13) inside that fin align with the rudder hinge. Glue part 18 first before finally glue the fin on the tail section.
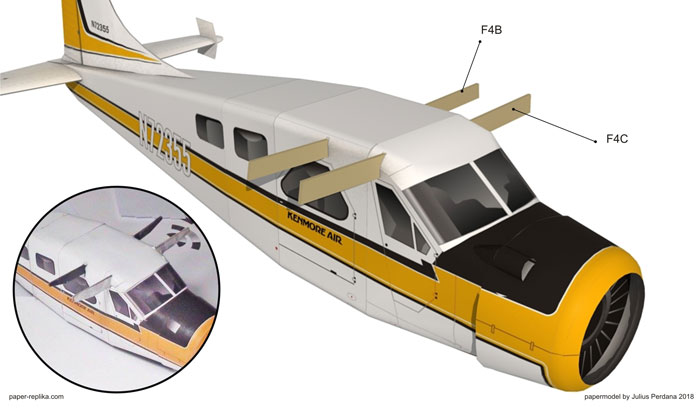
Carefully Make holes with sharp cutter on part 4 so the spars can get thru (F4B and F4C)
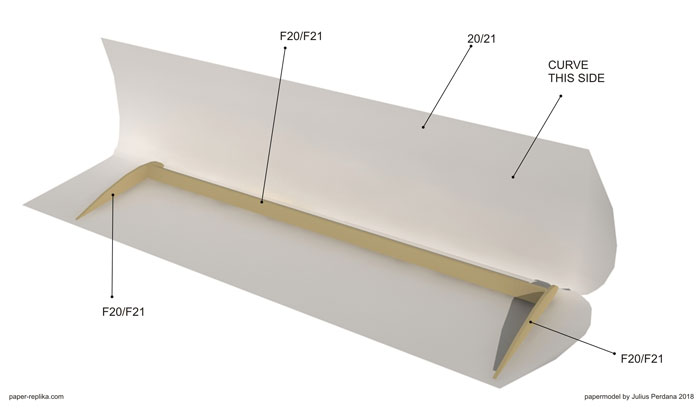
Score the fold line on the wing (20) and fold like the image above, make the top side slightly curved. Glue sets of formers (F20) inside the wing part. Close the top part and glue the wing on the trailling edge.
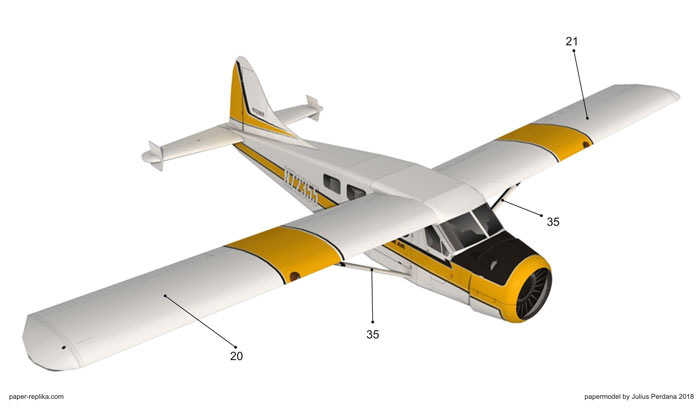
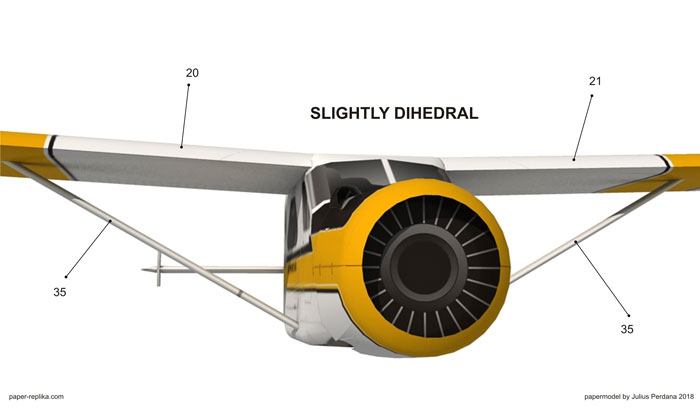
Insert the spars and glue both wings (20 and 21). Attach wing support struts (35)
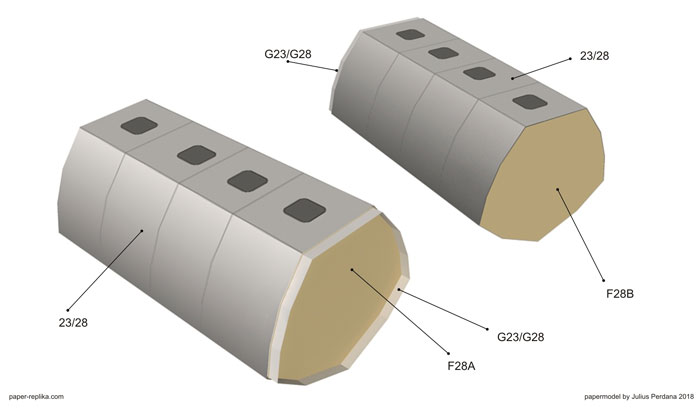
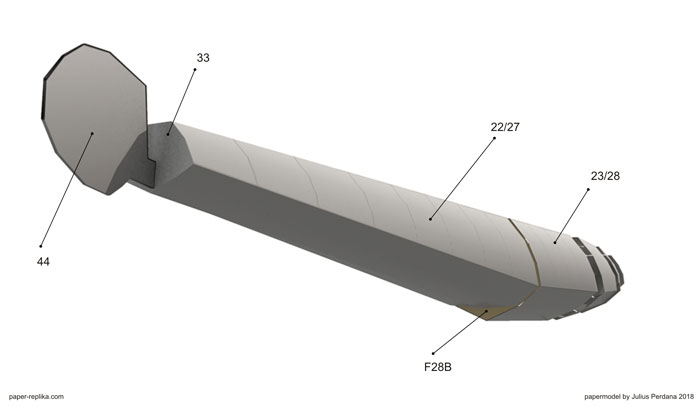
Glue part G23 to part 23. Assembly middle section of the float (23) with 2 formers (F23A & F23B).
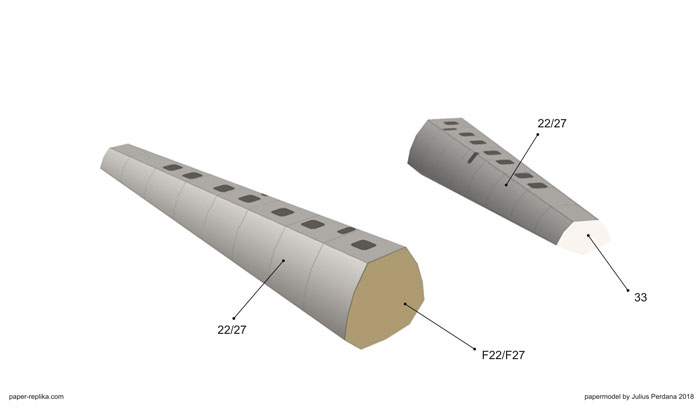
Assembly rear section of the float (22) with former (F22)
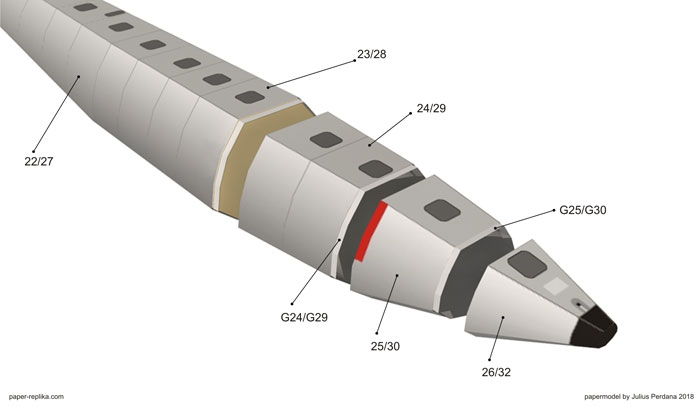
Assembly the rest of the float like the image above. Repeat the process on the other float.
Attach water rudder as shown above.
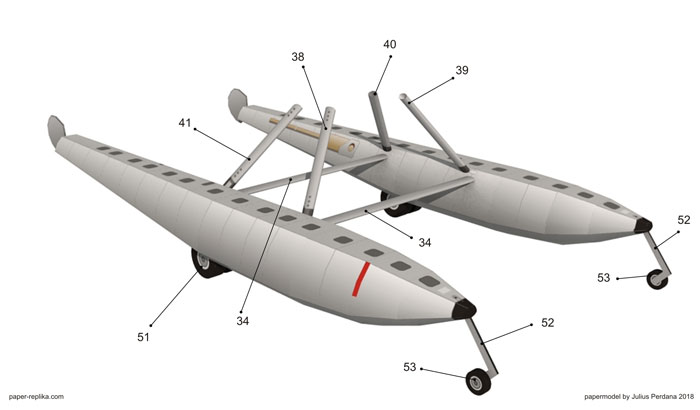
Attach all the wheels on each float so the wheels can support the float. Combine the 2 floats with both part 34. And then attach all the struts (38, 39, 40 and 41) as shown above. Positioned all the struts as the image. I use hot melt glue to cheat this step. Make sure you use the correct paper, which is 80-100 gram paper for all the struts and spinner.
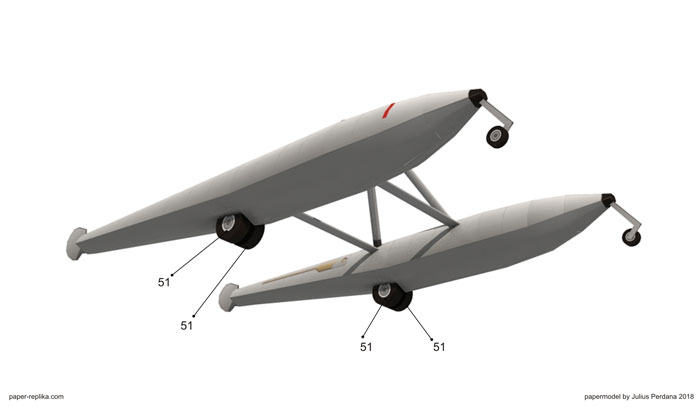
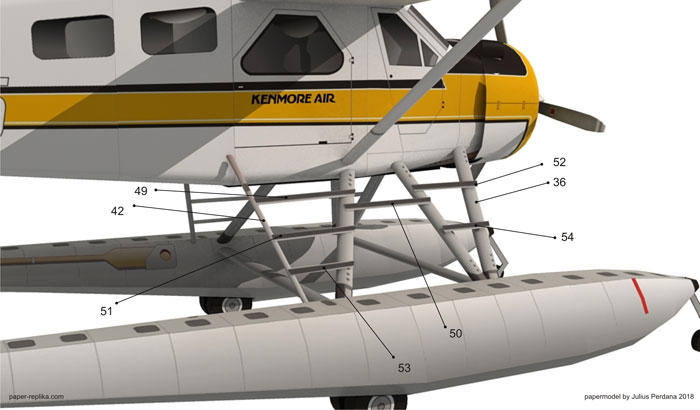
Turn around the aircraft upside down and then glue the previous set of floats on to the fuselage. When the glue cured/ dried attach the rest of the struts (36 and 51) and then work on the other side. Glue all the steps (49-54) on the struts as shown on the image above.
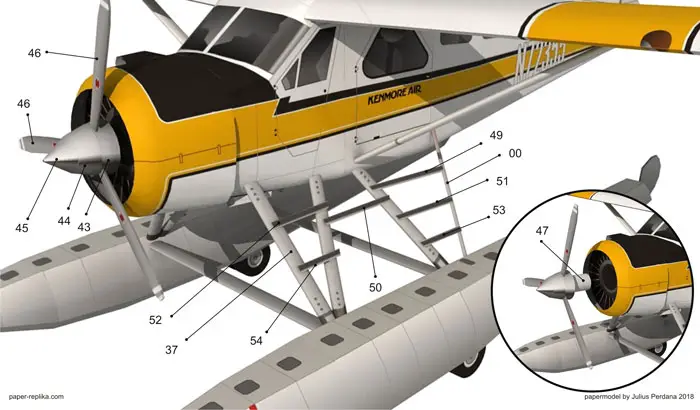
Assembly the spinner (43-45) and then attach all 3 propellers. Attach roll of paper (47) inside the spinner cone and then glue the propeller set on to the engine center.
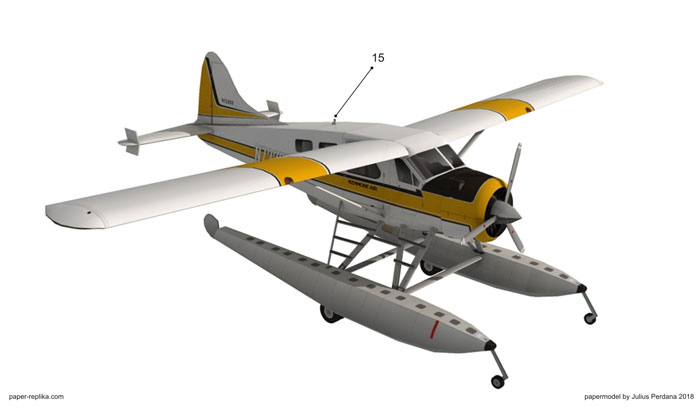
Glue the beacon light (15) on the fuselage.