
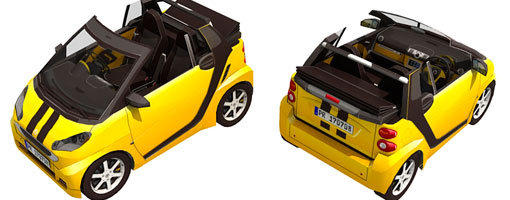
This model is simply a recolor version of the previous Smart Cabrio with light blue color. The differences are the L shape profile on each side is now colored black. Also front window frame, seats also repaint in black. The dashboard and side door panel colored in black with yellow. Racing stripes also added, to the front hood and the back of the car. The wheel also changed. The templates is added one page for left steer version of dashboard. The scale is 1/16, the templates consist of 10 pages of patterns.

Attach the dashboard part 15, by firstly assembly all the details before attaching it (10,12,13,18,20). Put part 32, 17 and 14. Assembly part 48, 6,7 and 16 then put inside the cabin part 55.

Assembly the back formers part 34 and part 37 and then put them on top back part1.

Shape and connect both its flaps of part 34 until has the appearance as the image above. Assembly all the wheel parts (61,67,65,68,64 and 66).

Assembly the front part of the car part 44 by attaching its headlights. You can choose whether to use texturized headlights (part 4) or the detailed ones. To use the detailed headlights : assembly part 39 and 60 first before attaching on part 44. Use transparent celluloid on part 60.

Assembly all the parts of the car body base, part 44,33,28 and 24

Continue by attaching all the car body detail parts. Assembly part 49,50 and 51 first, before attaching on front part of the car. Use transparent celluloid on part 21 (side small windows). Put part 30(s) to cover the inside part. Put part 43 and 42 in its place then put the roll bar part 47. Then put part 8 and 9 on each side of the car. Back bumper consists of 3 parts, which are part 45, 46, 41 and 40.

Valley fold part 50 then put part 49(s).

Assembly the front window : place part 3 on top part 56 (use transparent celluloid) first then attach on part 53. After that close it with part 54 (valley fold)

Before attaching the from window to the car body, make sure you already attach part 19.

Assembly the front window the car body then attach the front mirror (part 11) and side mirrors (31). Place the detail profile on the back (part 23), make sure you curved it before glue it in its place. Glue the back lamps (26 and 27) and the last attach the license plate number (part 25).

Assembly the chassis with the car body.

Close it with part 22 on the bottom.

Attach a detail part (part 38) and the wipers (36). Assembly the car seats (59 and 58) and the seat belts (35)

Attach a detail part (part 38) and the wipers (36).

Combine part 5 and 57 and fold it in accordion style shape and put on top part 52 and the last put them on top the back of the car. The car model is finish.
